
Setup a custom domain
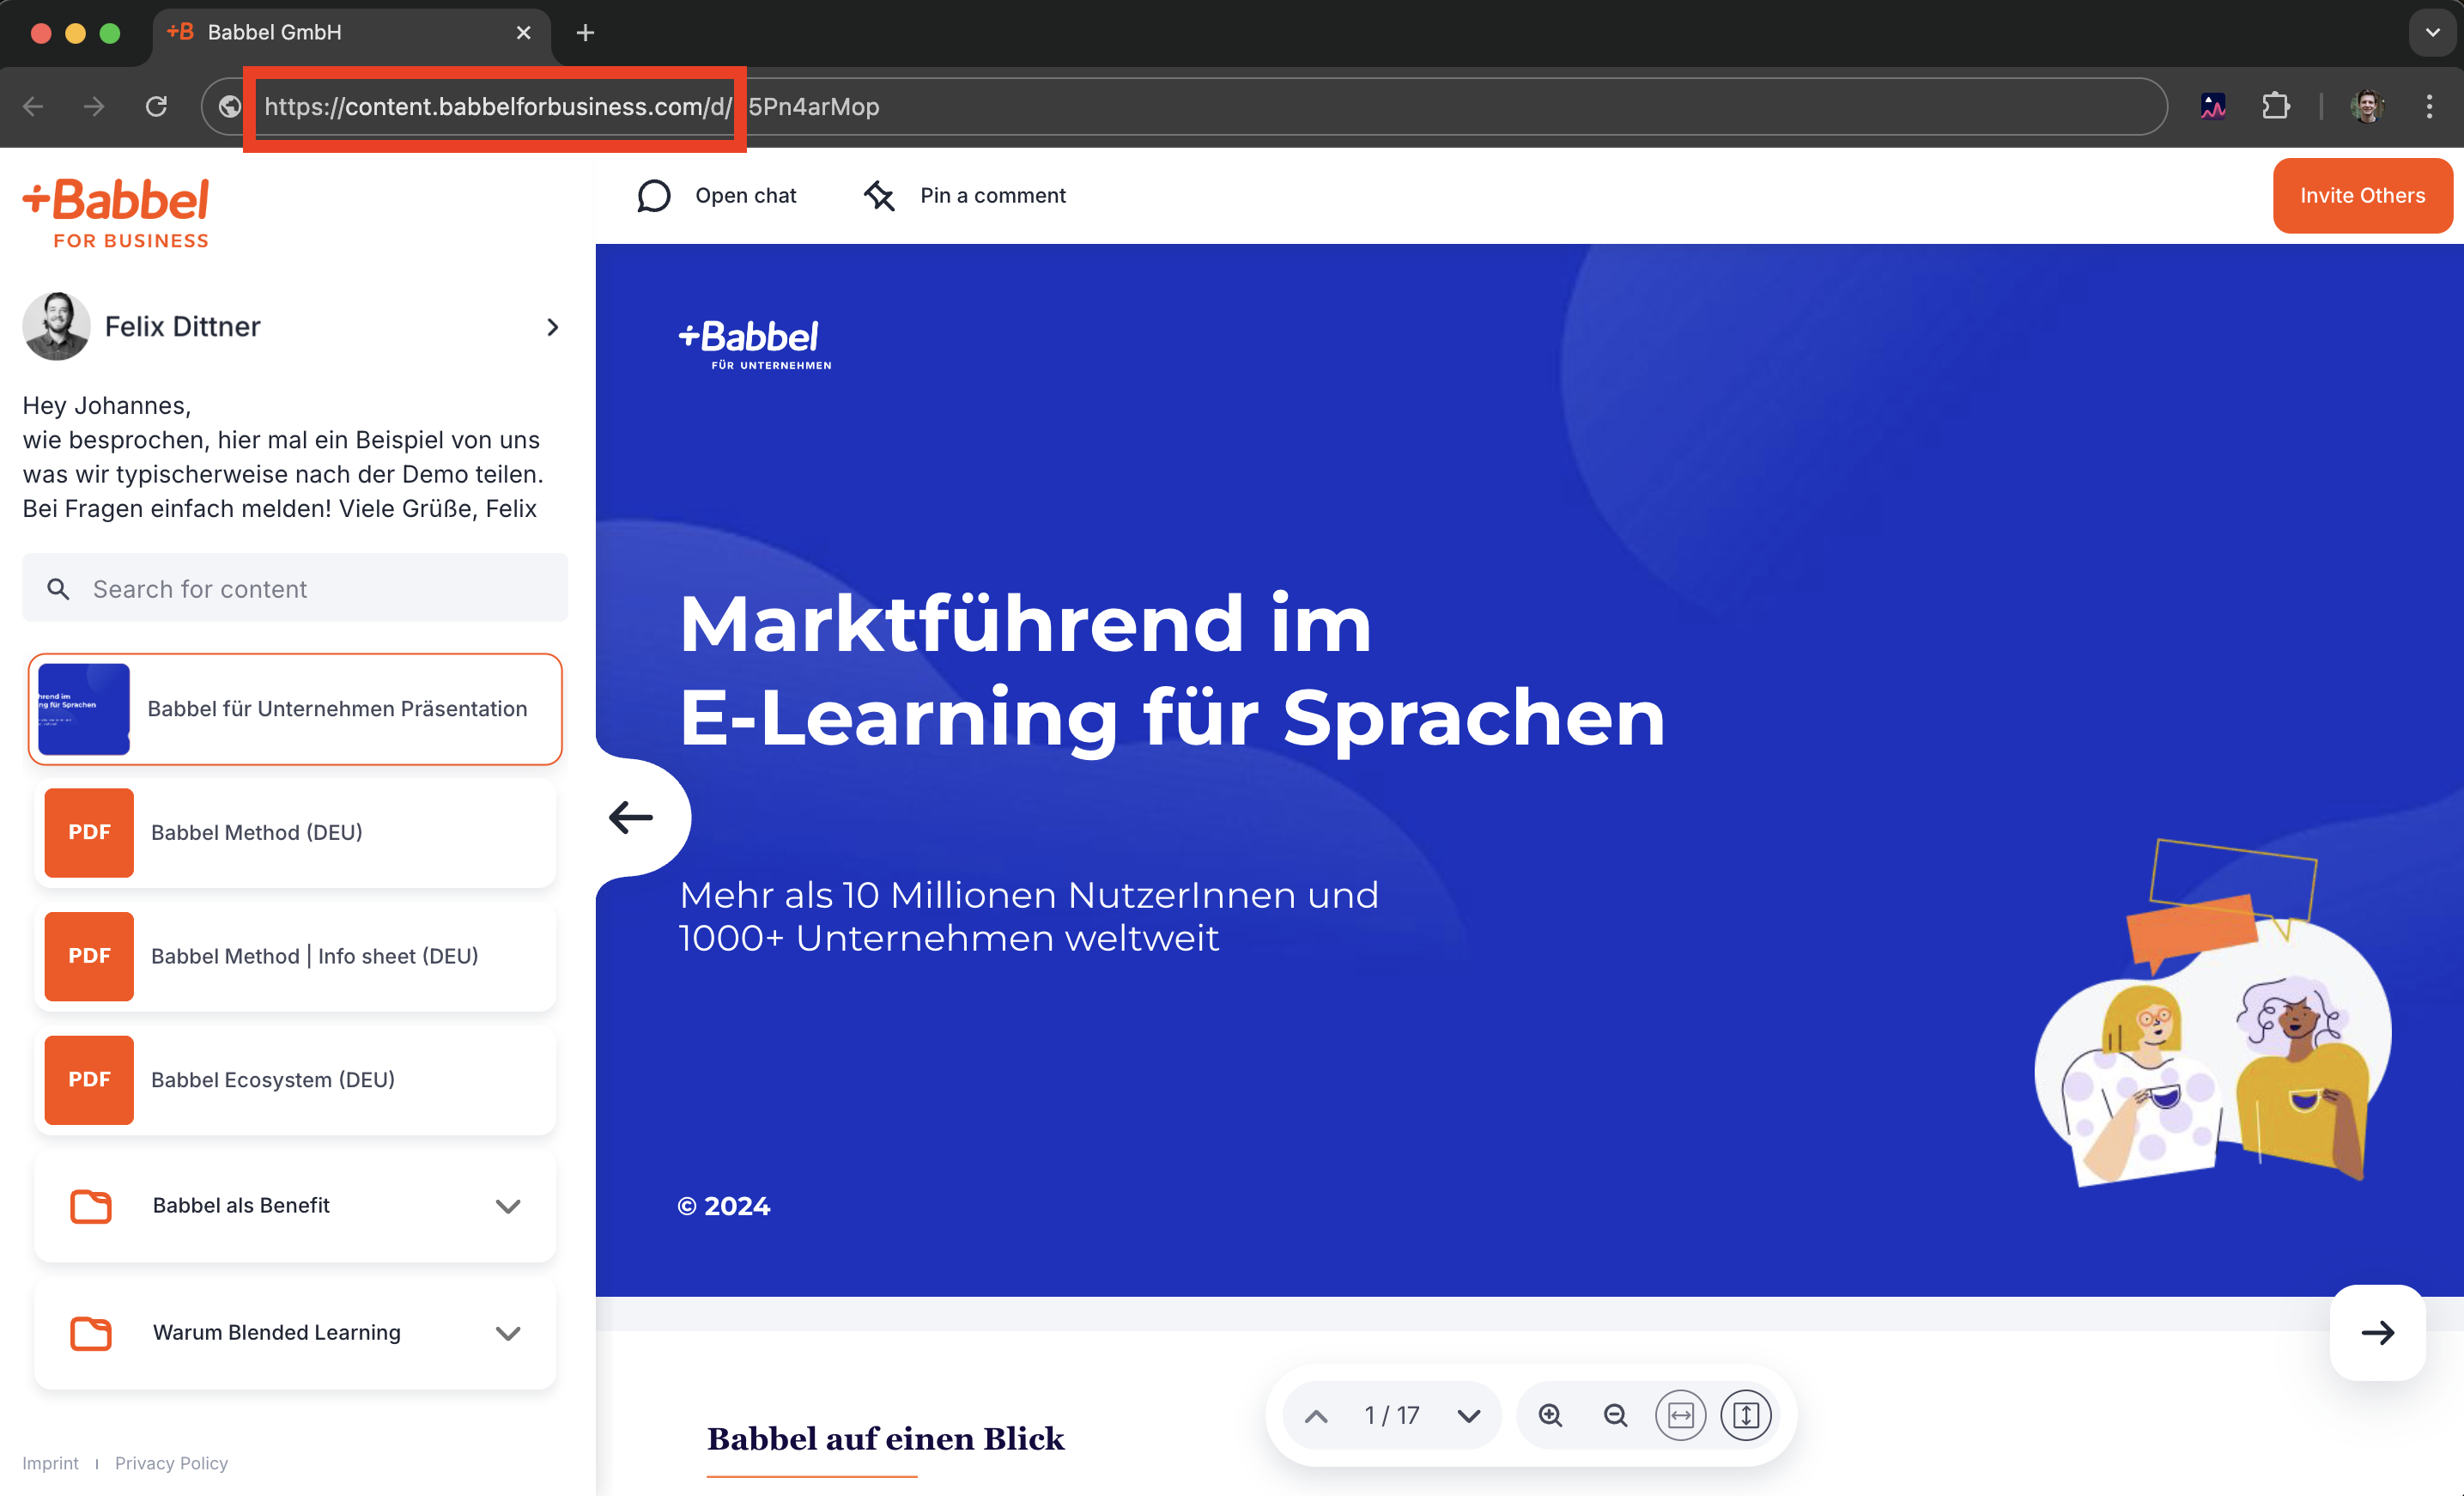
In this article, you’ll learn how to set up a custom subdomain in emlen. Once set up, your Destinations will be accessible through this domain. For example:
Important: You’ll likely need help from your IT department to complete the setup. Please read through the full instructions first, and coordinate with your IT department before starting.
To set up the custom domain, you’ll need to update DNS records with your DNS provider. Make sure you have login credentials for your DNS provider and access to the CNAME records. Due to security requirements, the subdomain connection to emlen must be completed within 168 hours; otherwise, the DNS records will expire.
Follow these steps:
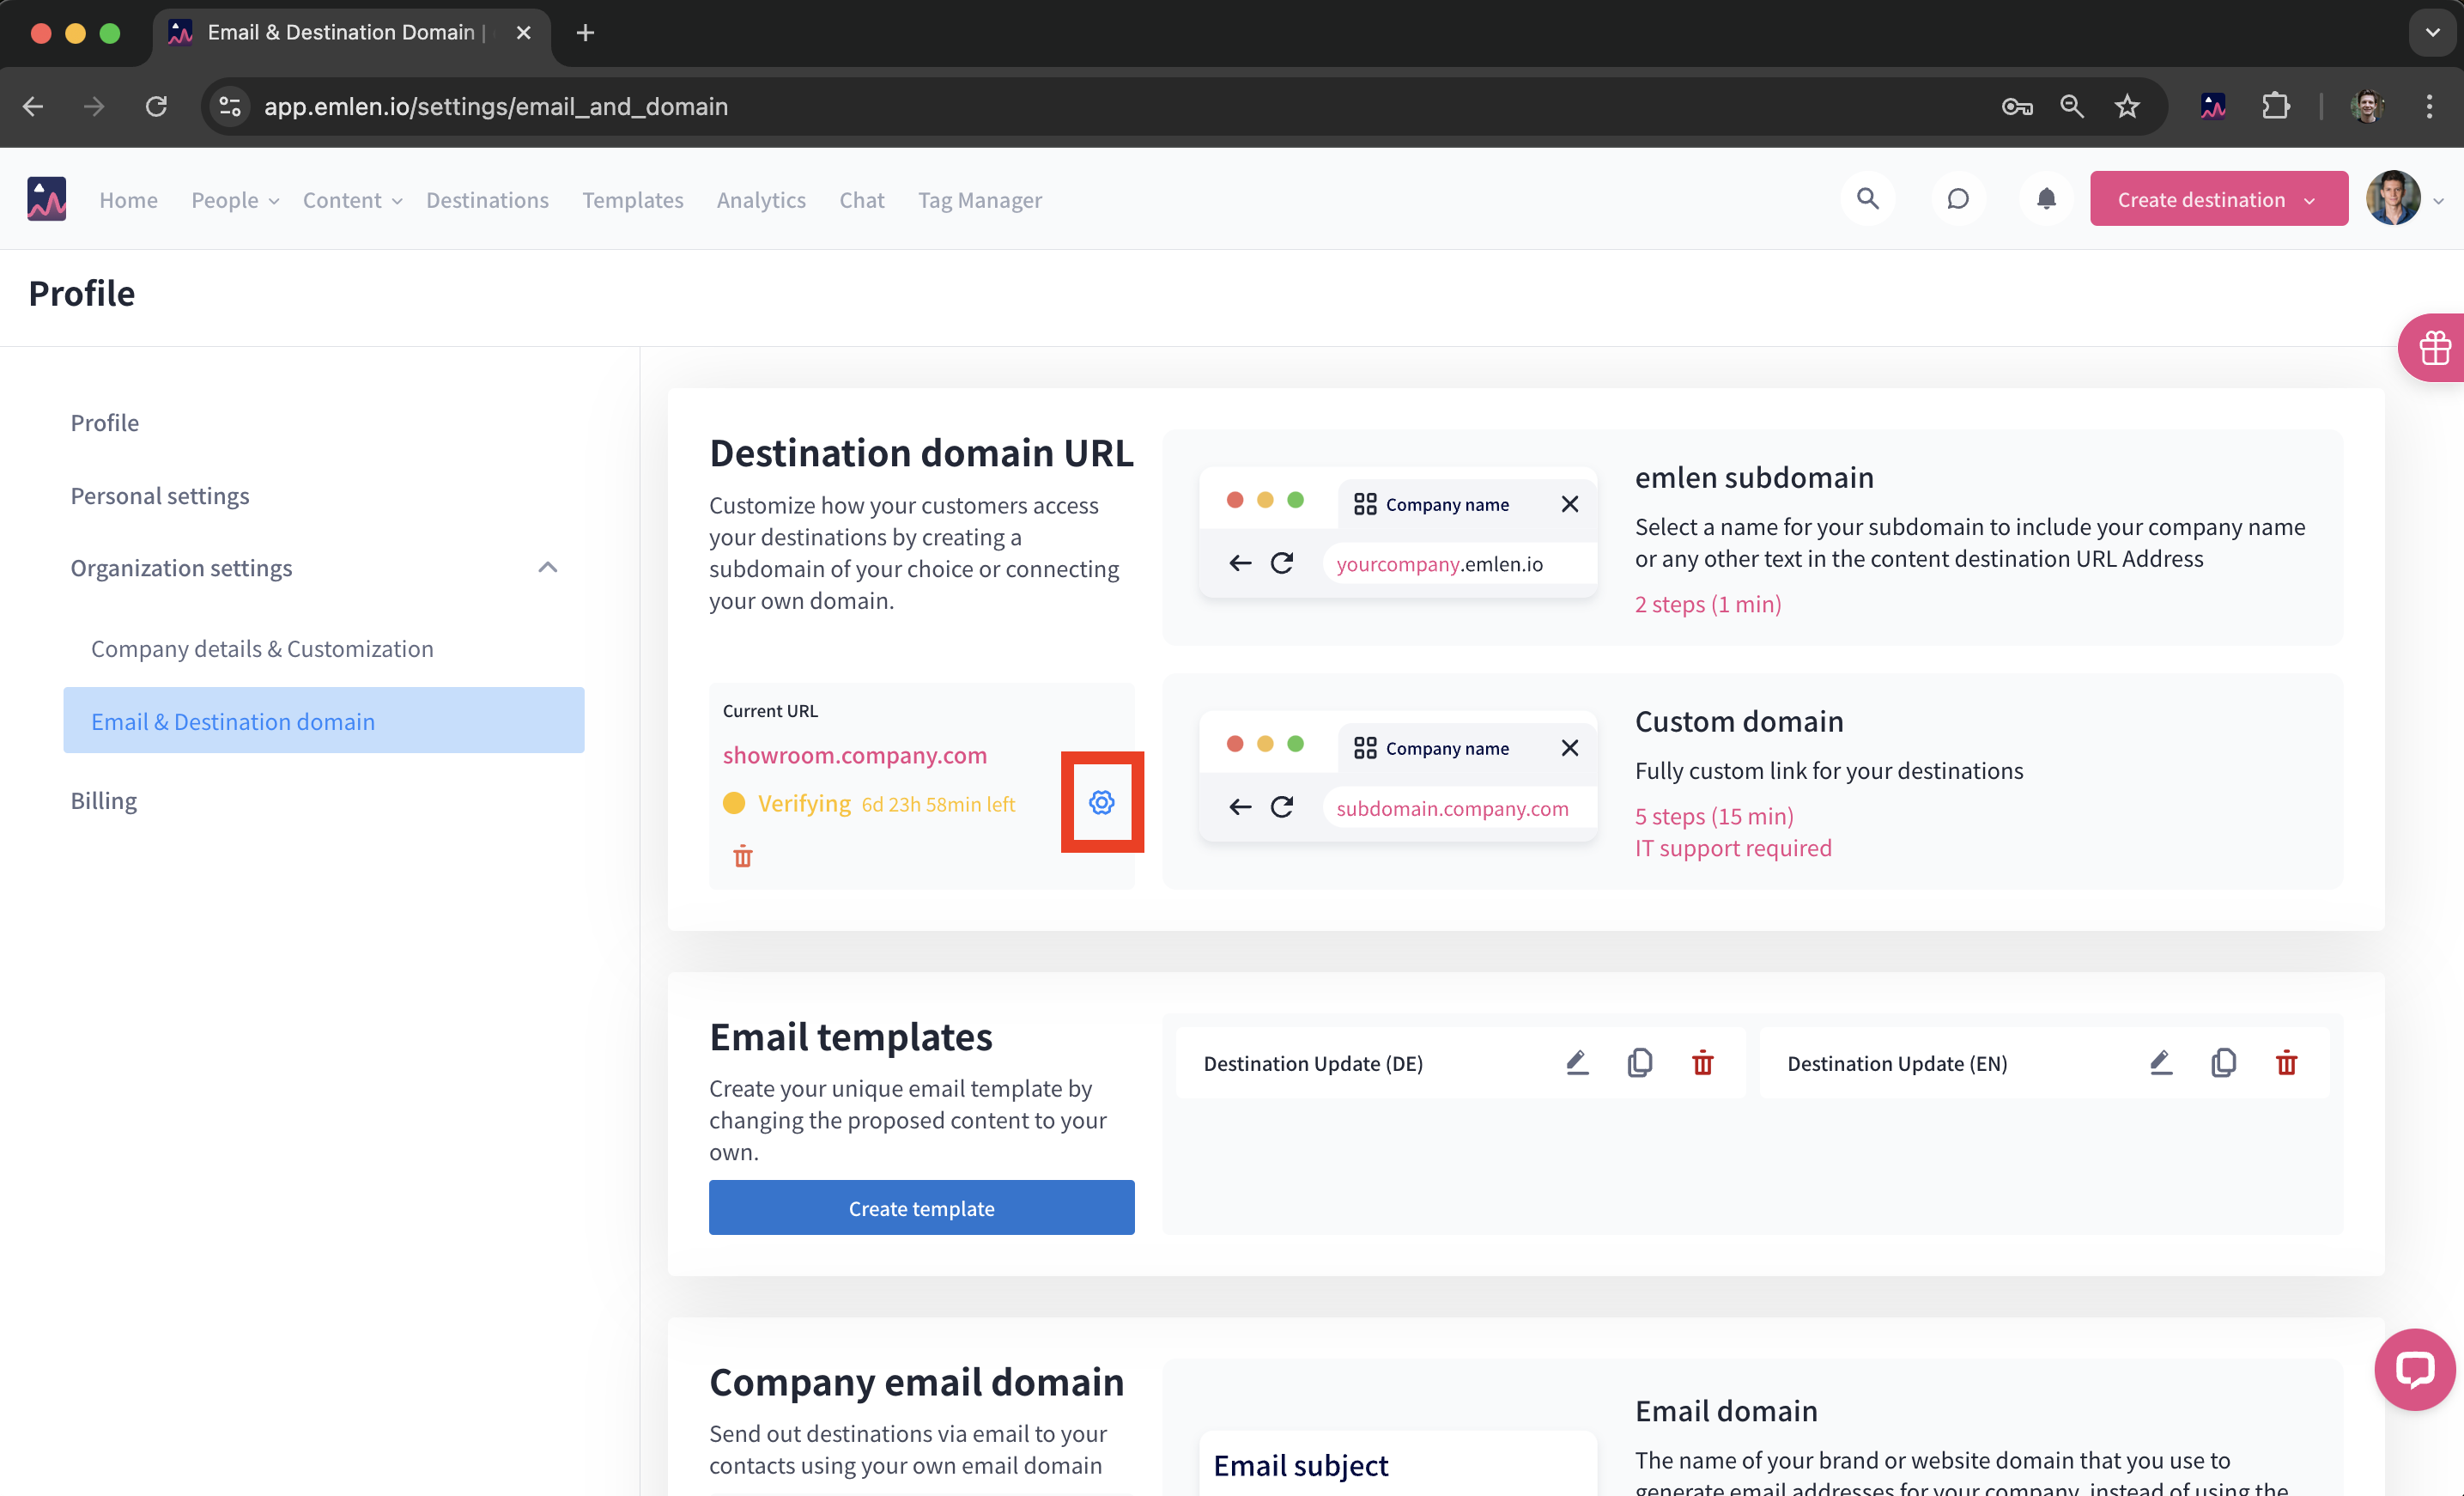
1. Go to Email & Destination domain settings
2. Select "Customize the URL" and then "Connect your domain"
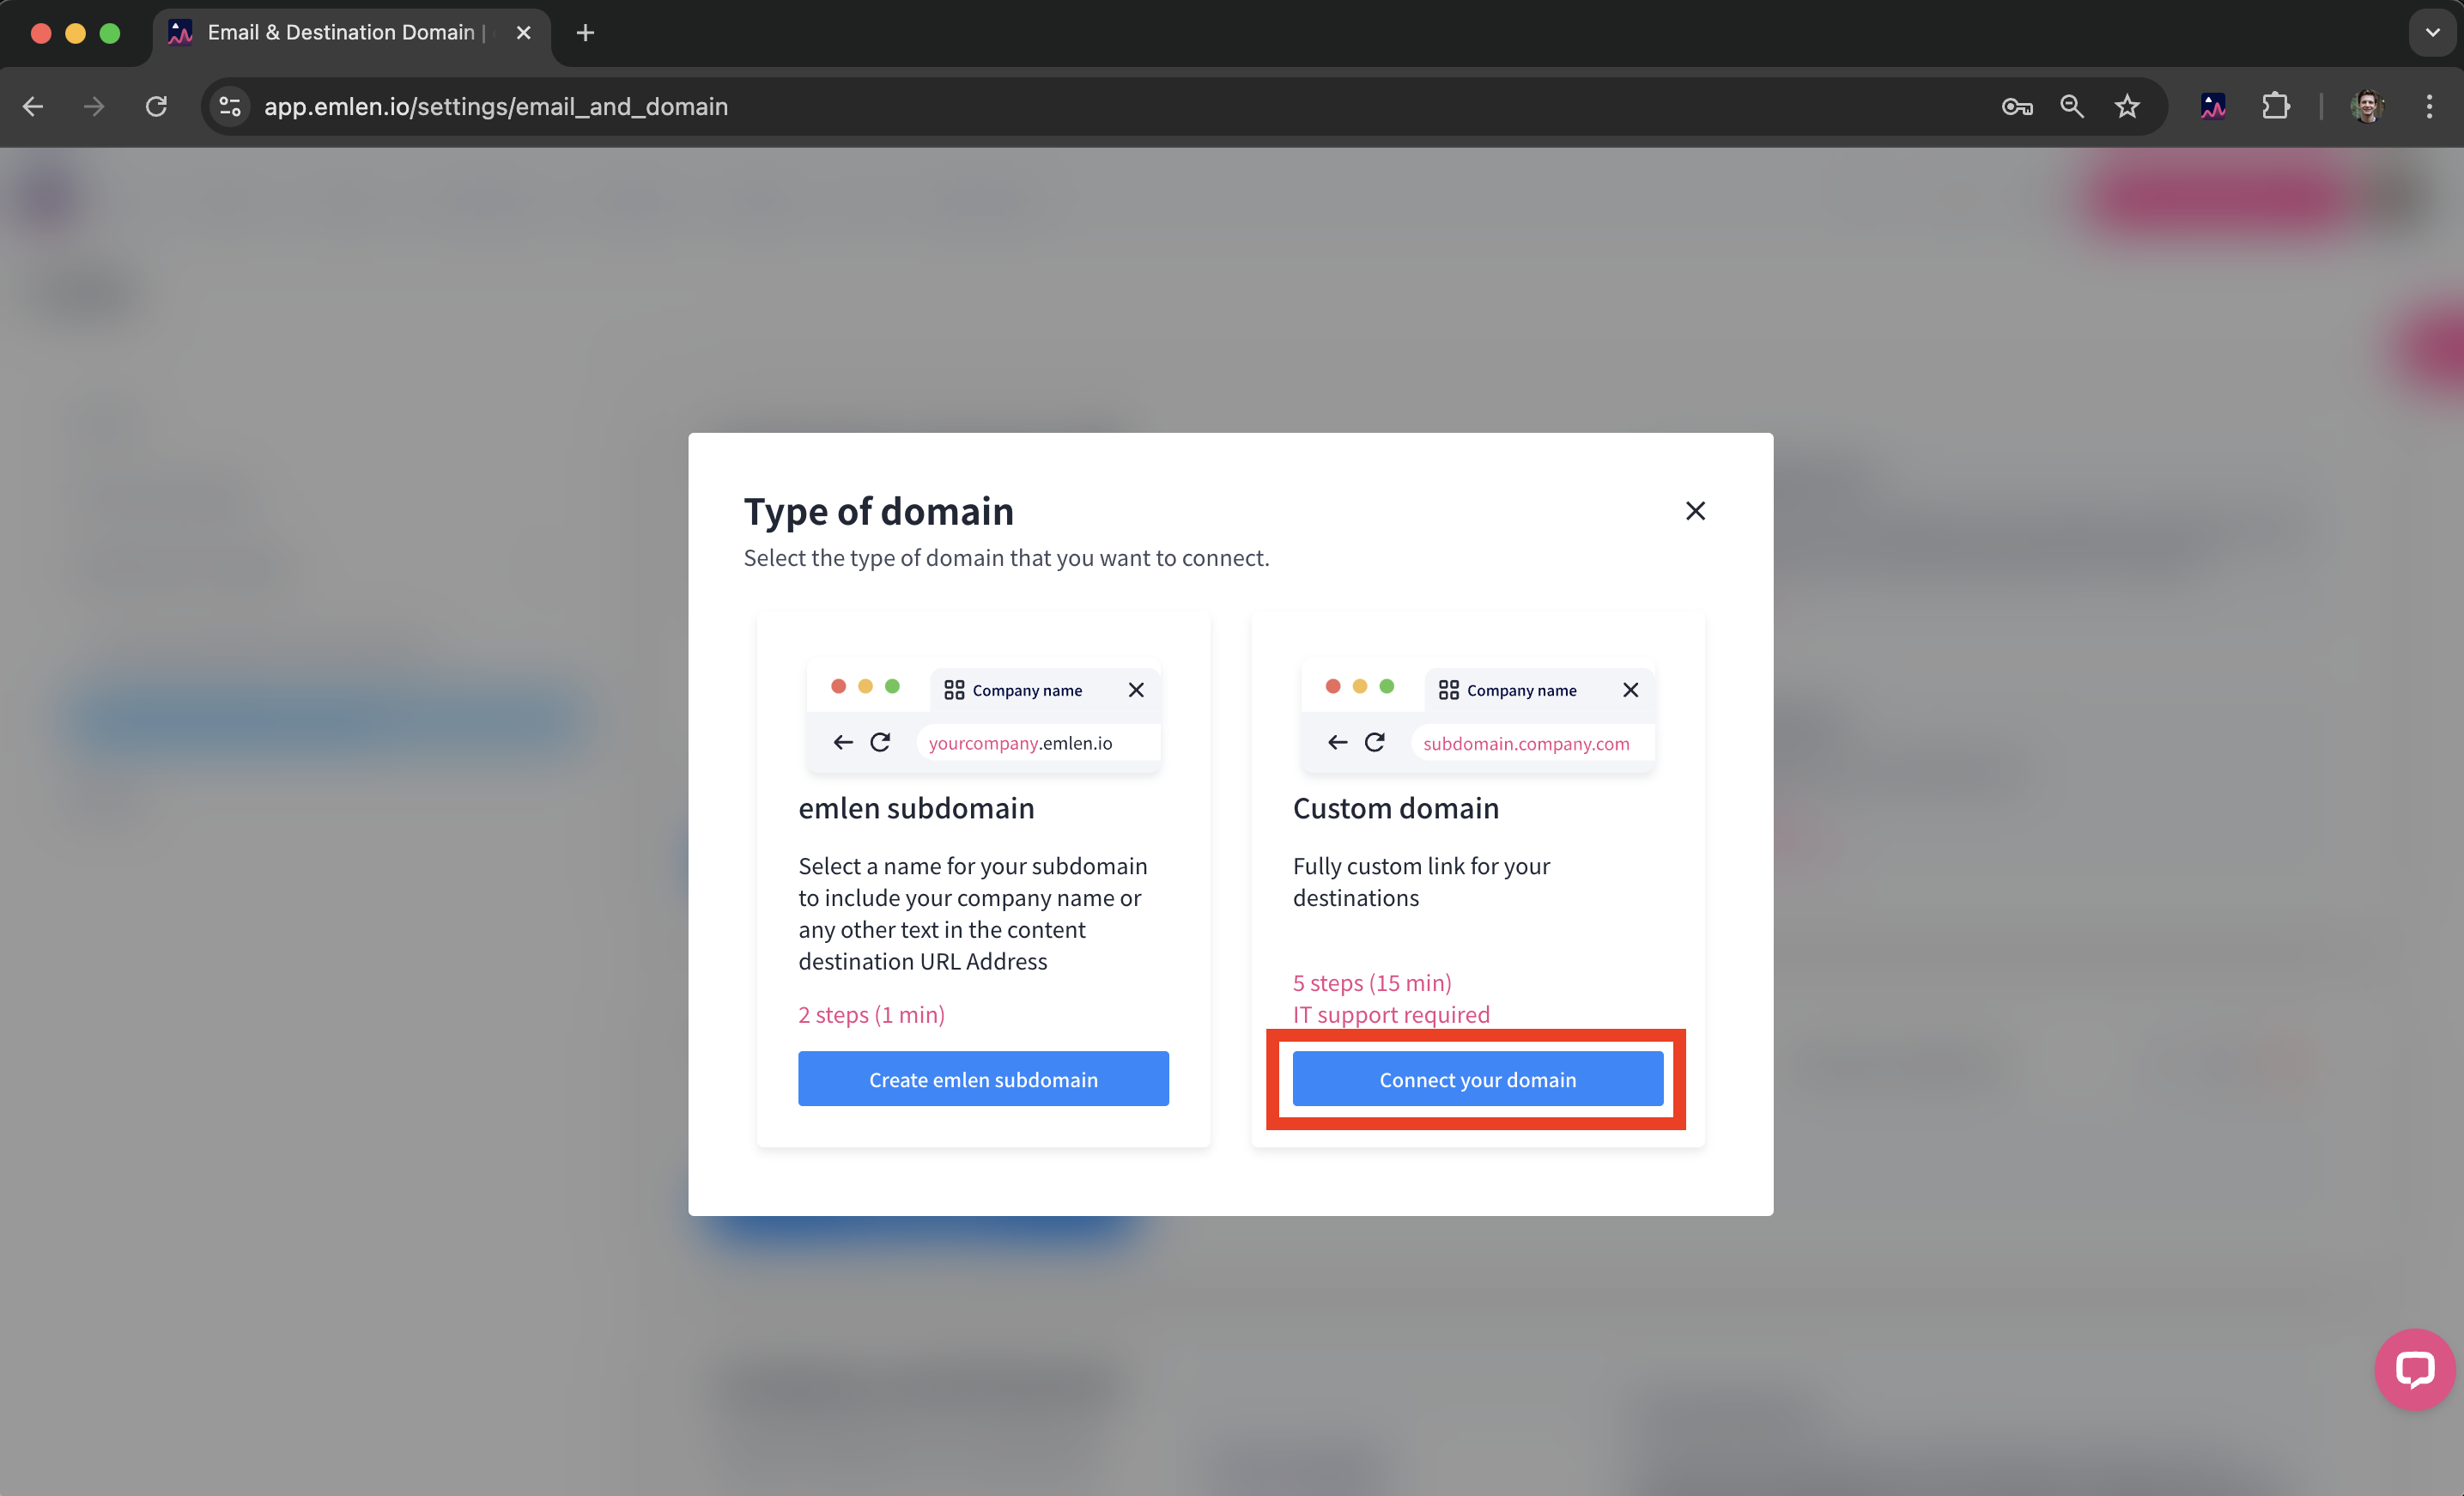
If you previously used an emlen subdomain, click “Edit” and then “Connect your domain” to switch to a custom domain.
3. Enter the desired domain
Popular names for the custom domain are:
- content.yourcompany.com
- showroom.yourcompany.com
- experience.yourcompany.com
- hub.yourcompany.com
Include the subdomain but exclude “https://” (e.g., hub.contracthero.com). Each part of the domain name can only contain letters (a-z), numbers (0-9), or hyphens (”-”), separated by periods (”.”). It’s best to use lowercase letters. Then, click "Connect".
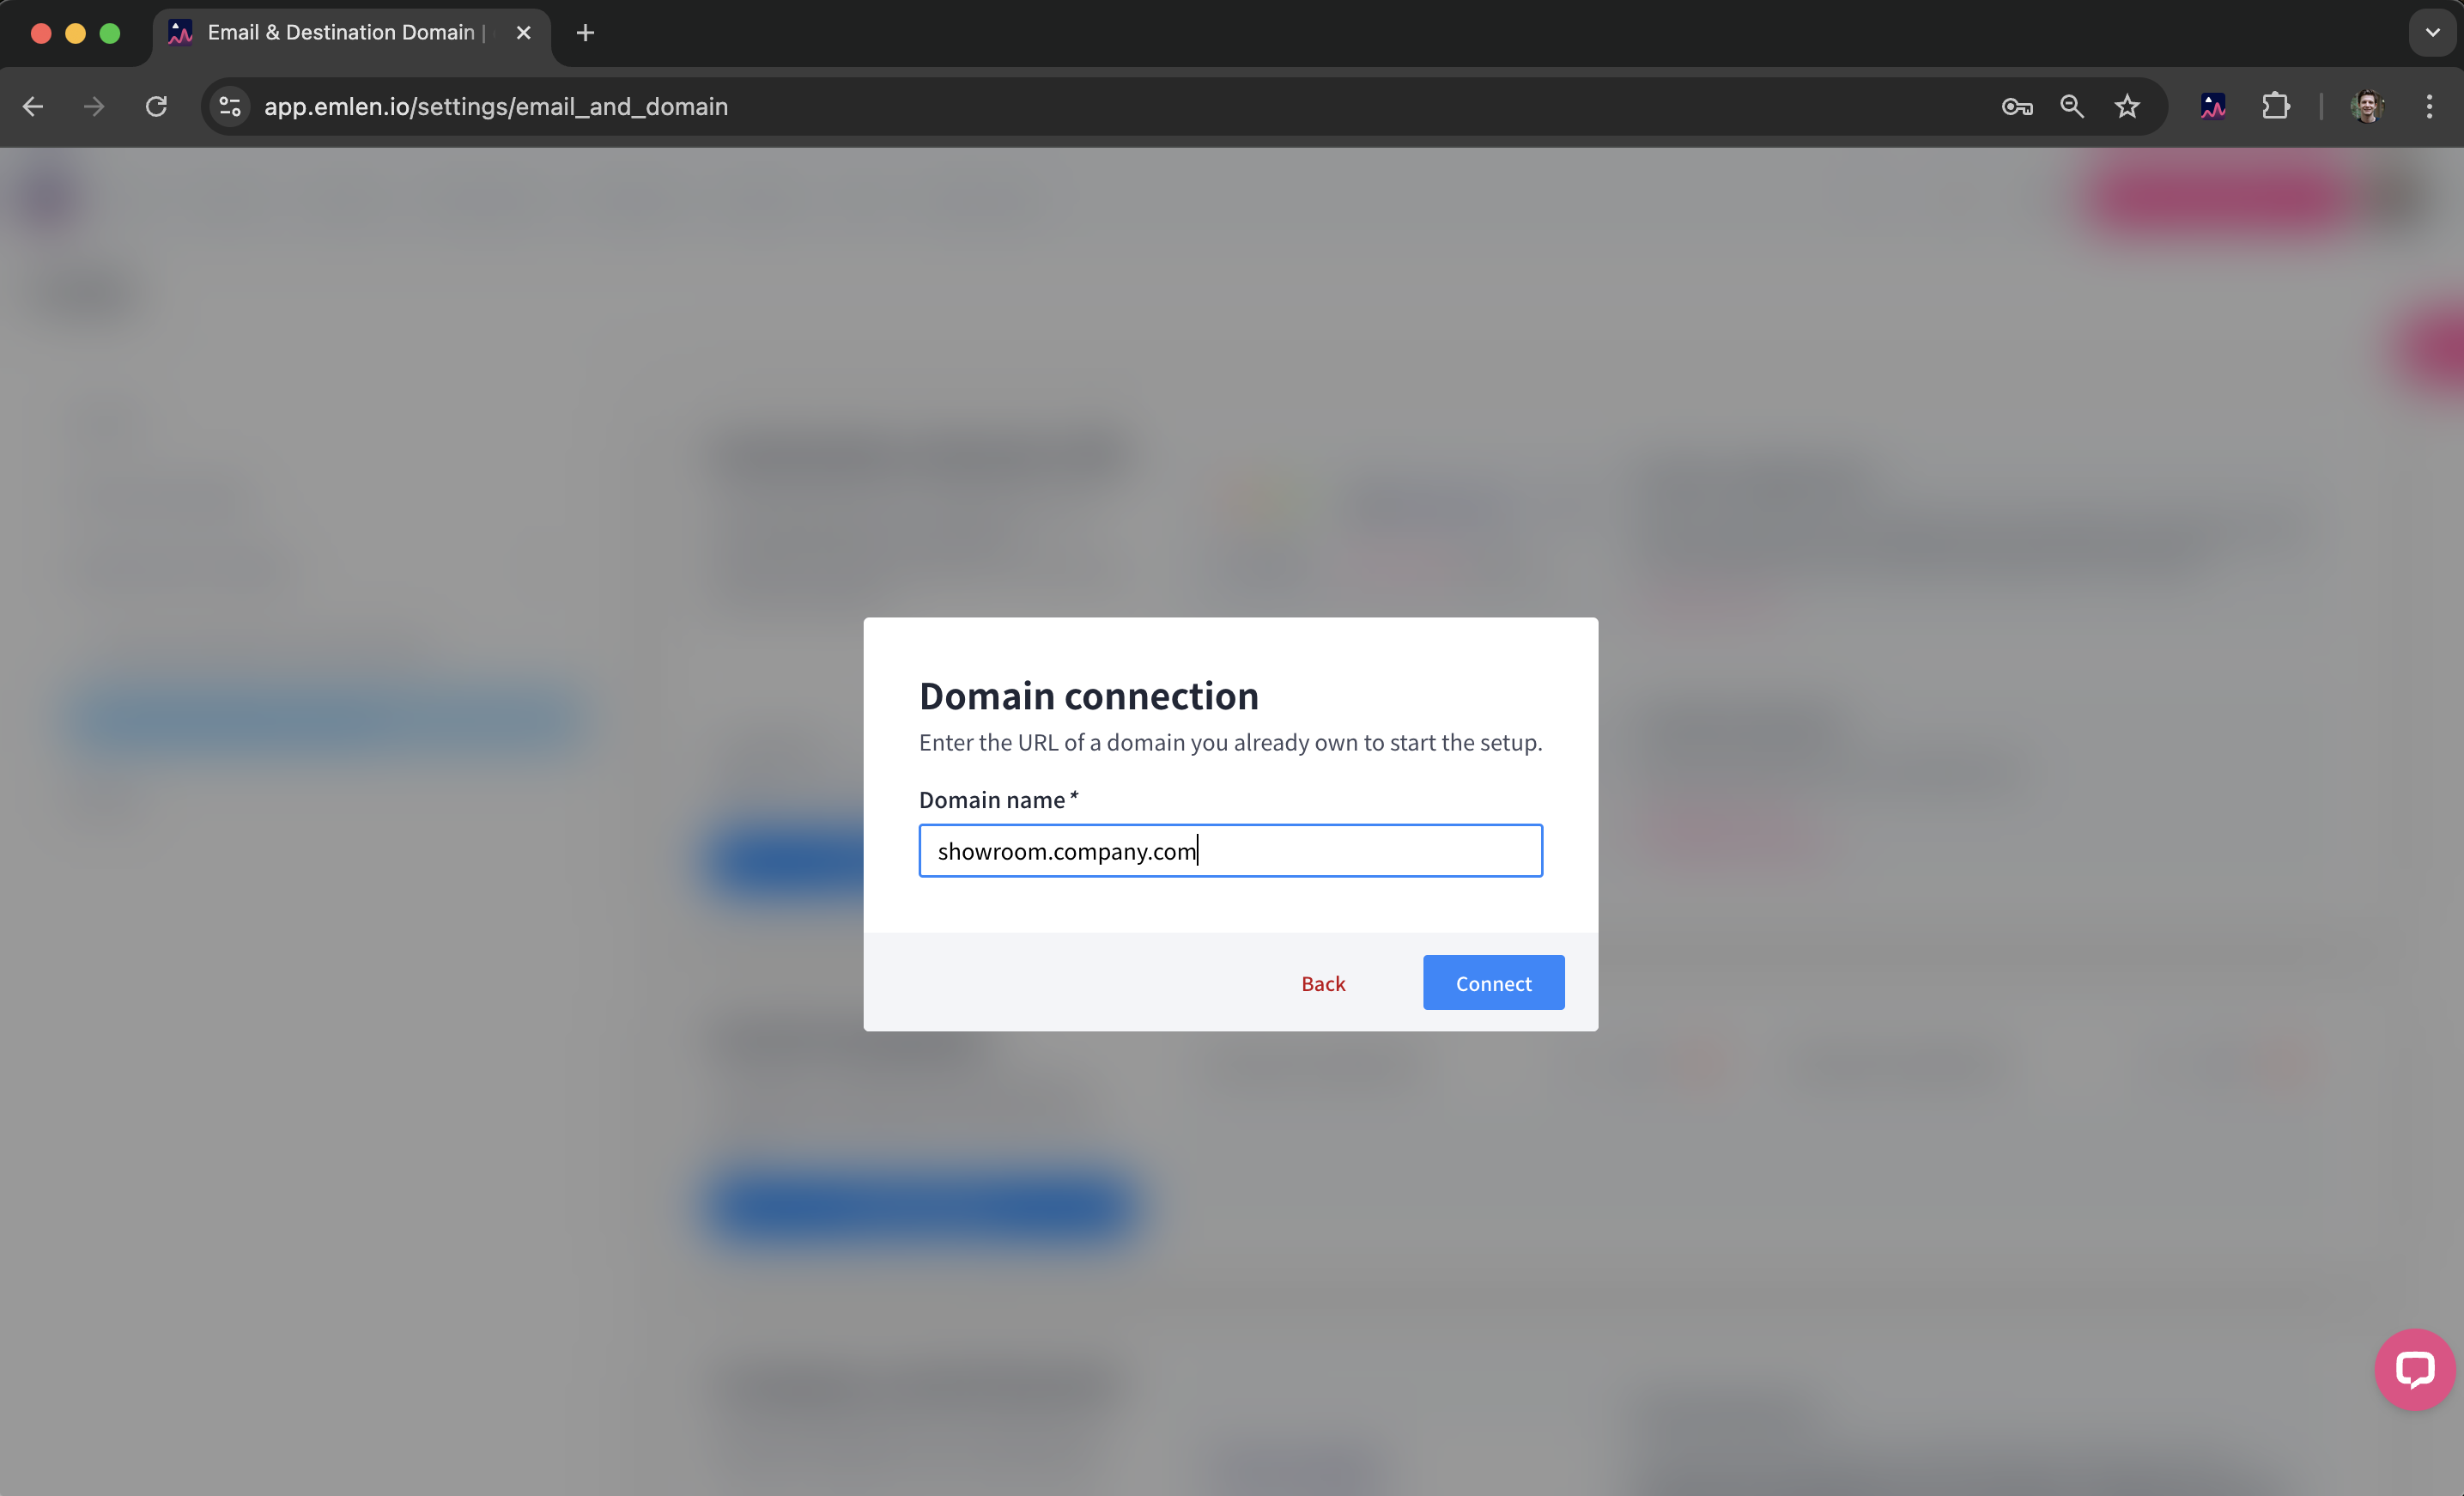
Note: The subdomain should not exist already. If it does, delete it and wait 24 hours before restarting the process in emlen.
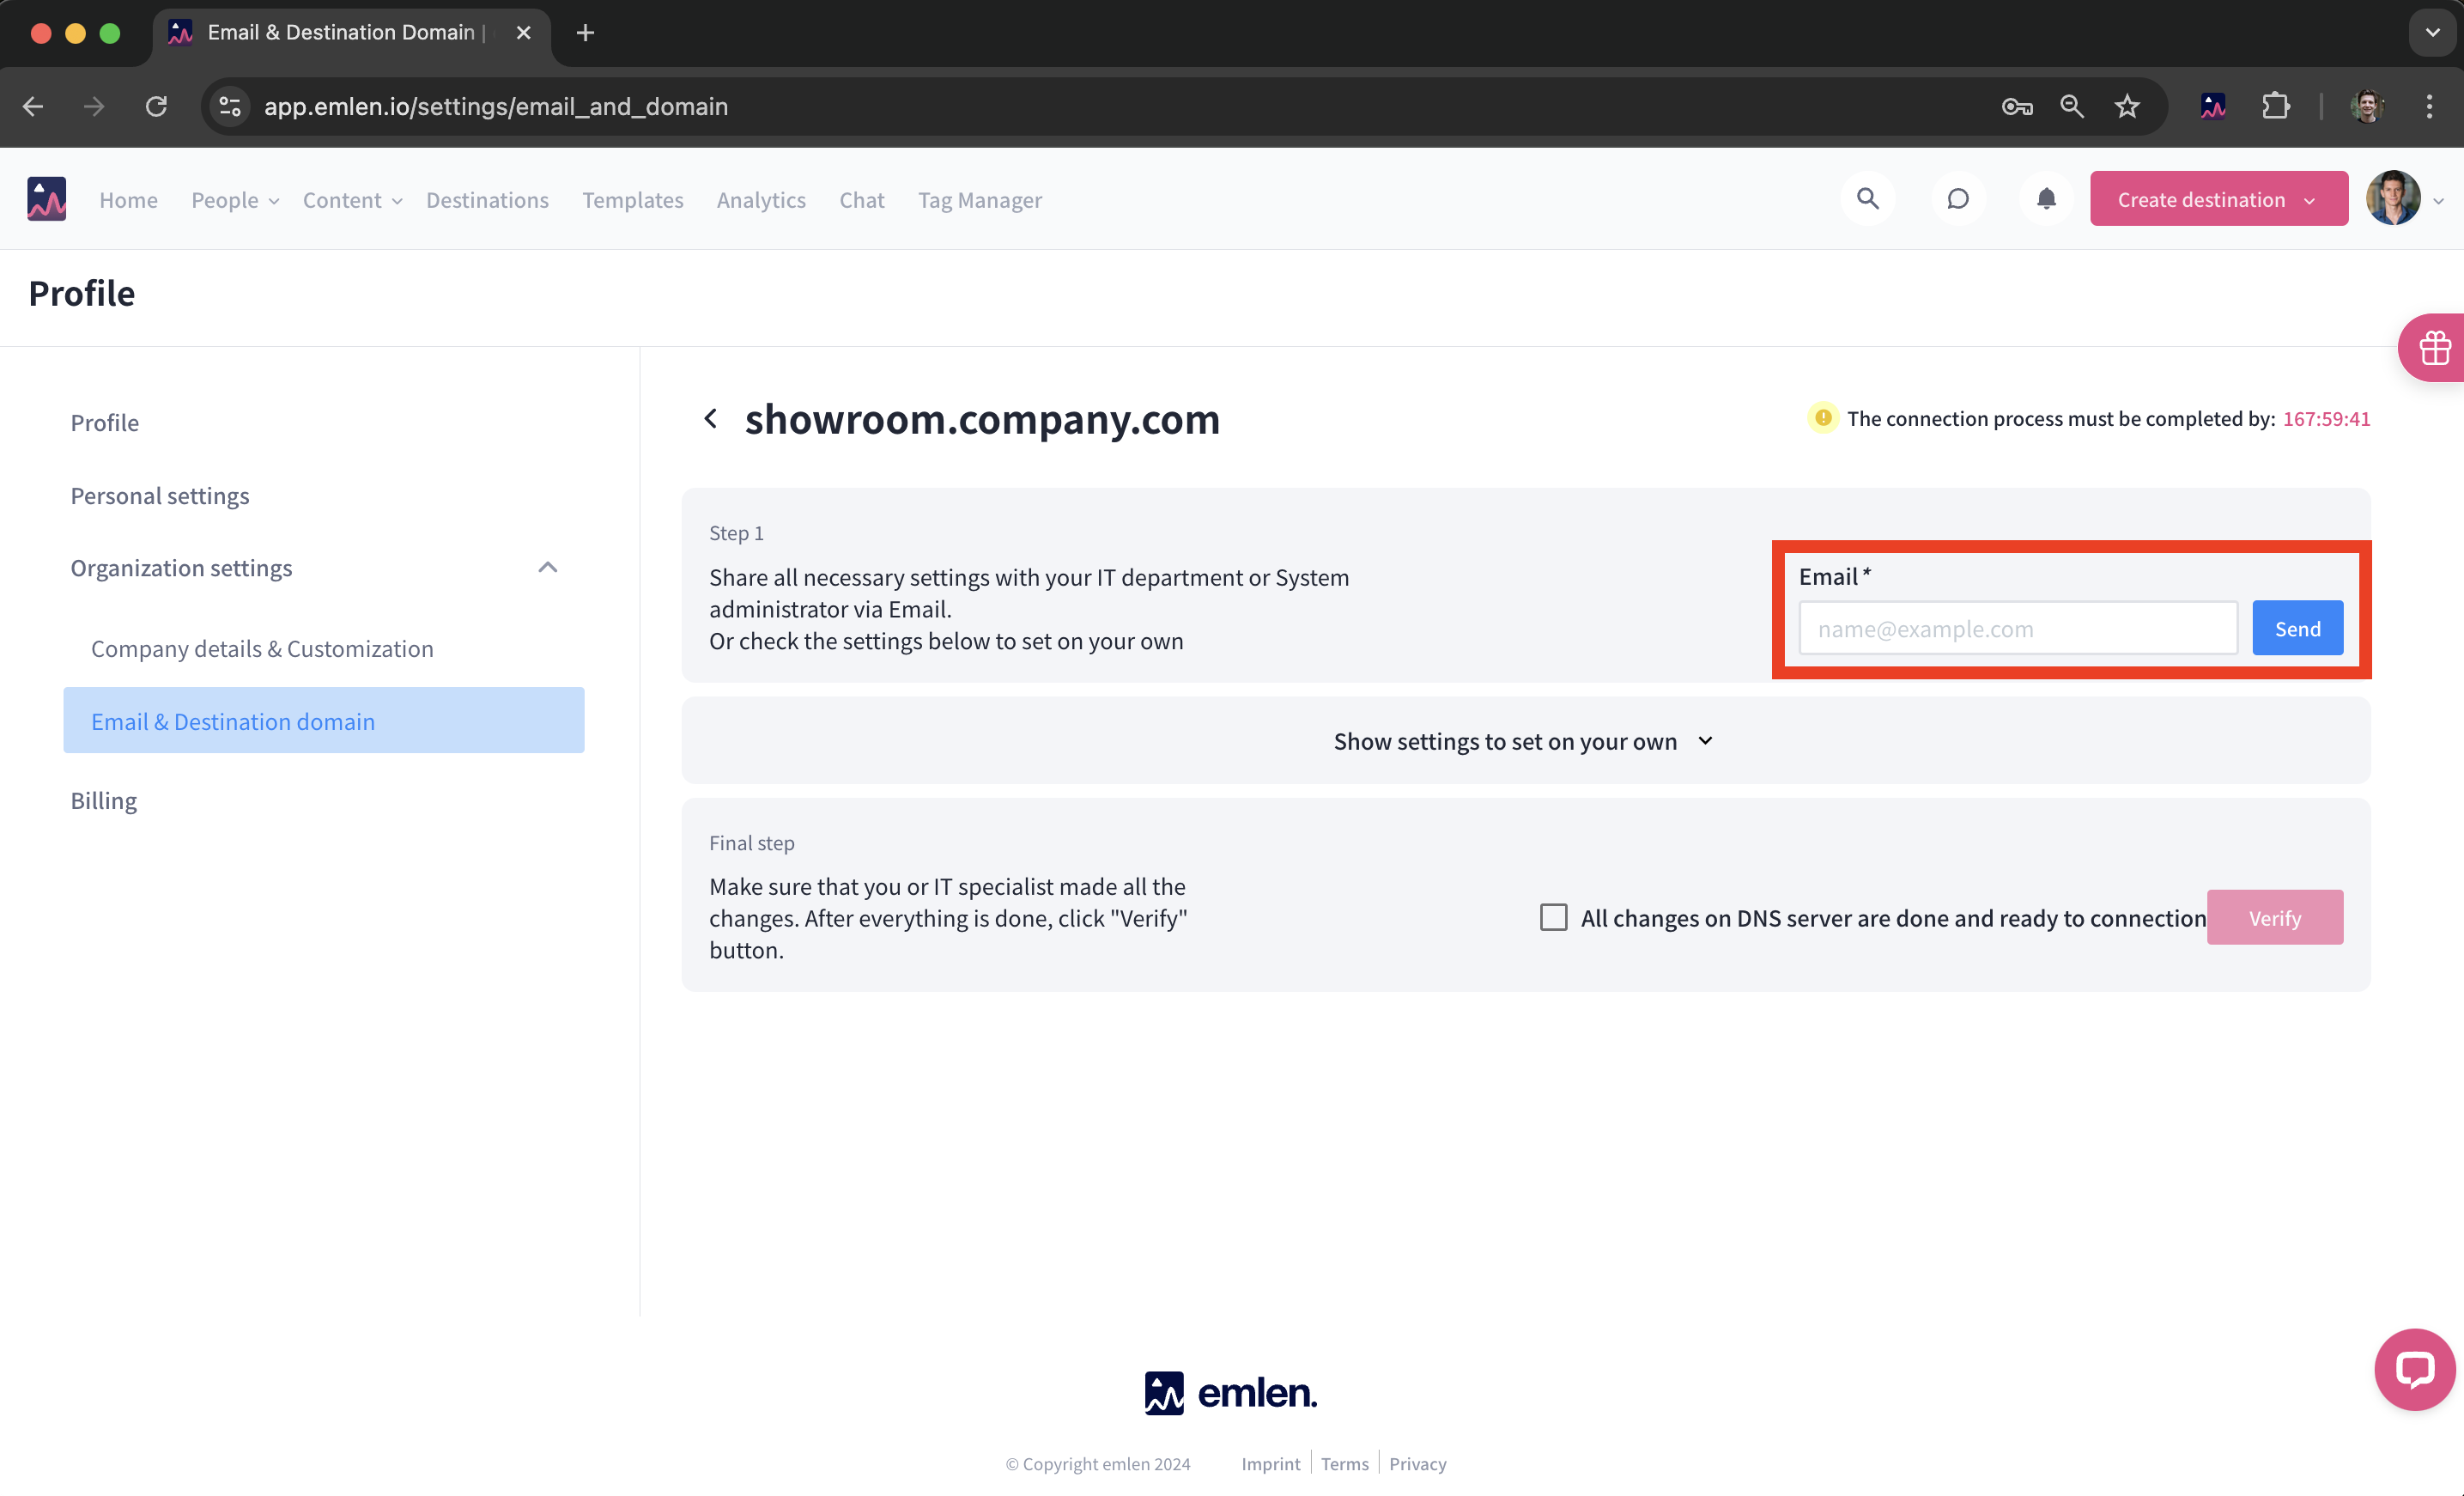
4. Forward the DNS entries
Depending on the DNS system, 2-3 entries will be generated. You can provide your IT admin’s email address to have the DNS details sent directly to them. Make sure to instruct your IT admin to enter all the entries simultaneously.
⚠️ Please be careful not to duplicate the root domain. Some DNS management tools require that you enter only the subdomain when adding a new DNS entry. For example, if creating a DNS entry named "sub-domain.my-company.com", you may need to enter only "sub-domain", to avoid actually creating an entry called "sub-domain.my-company.com.my-company.com".
Alternatively, you can set the records yourself.
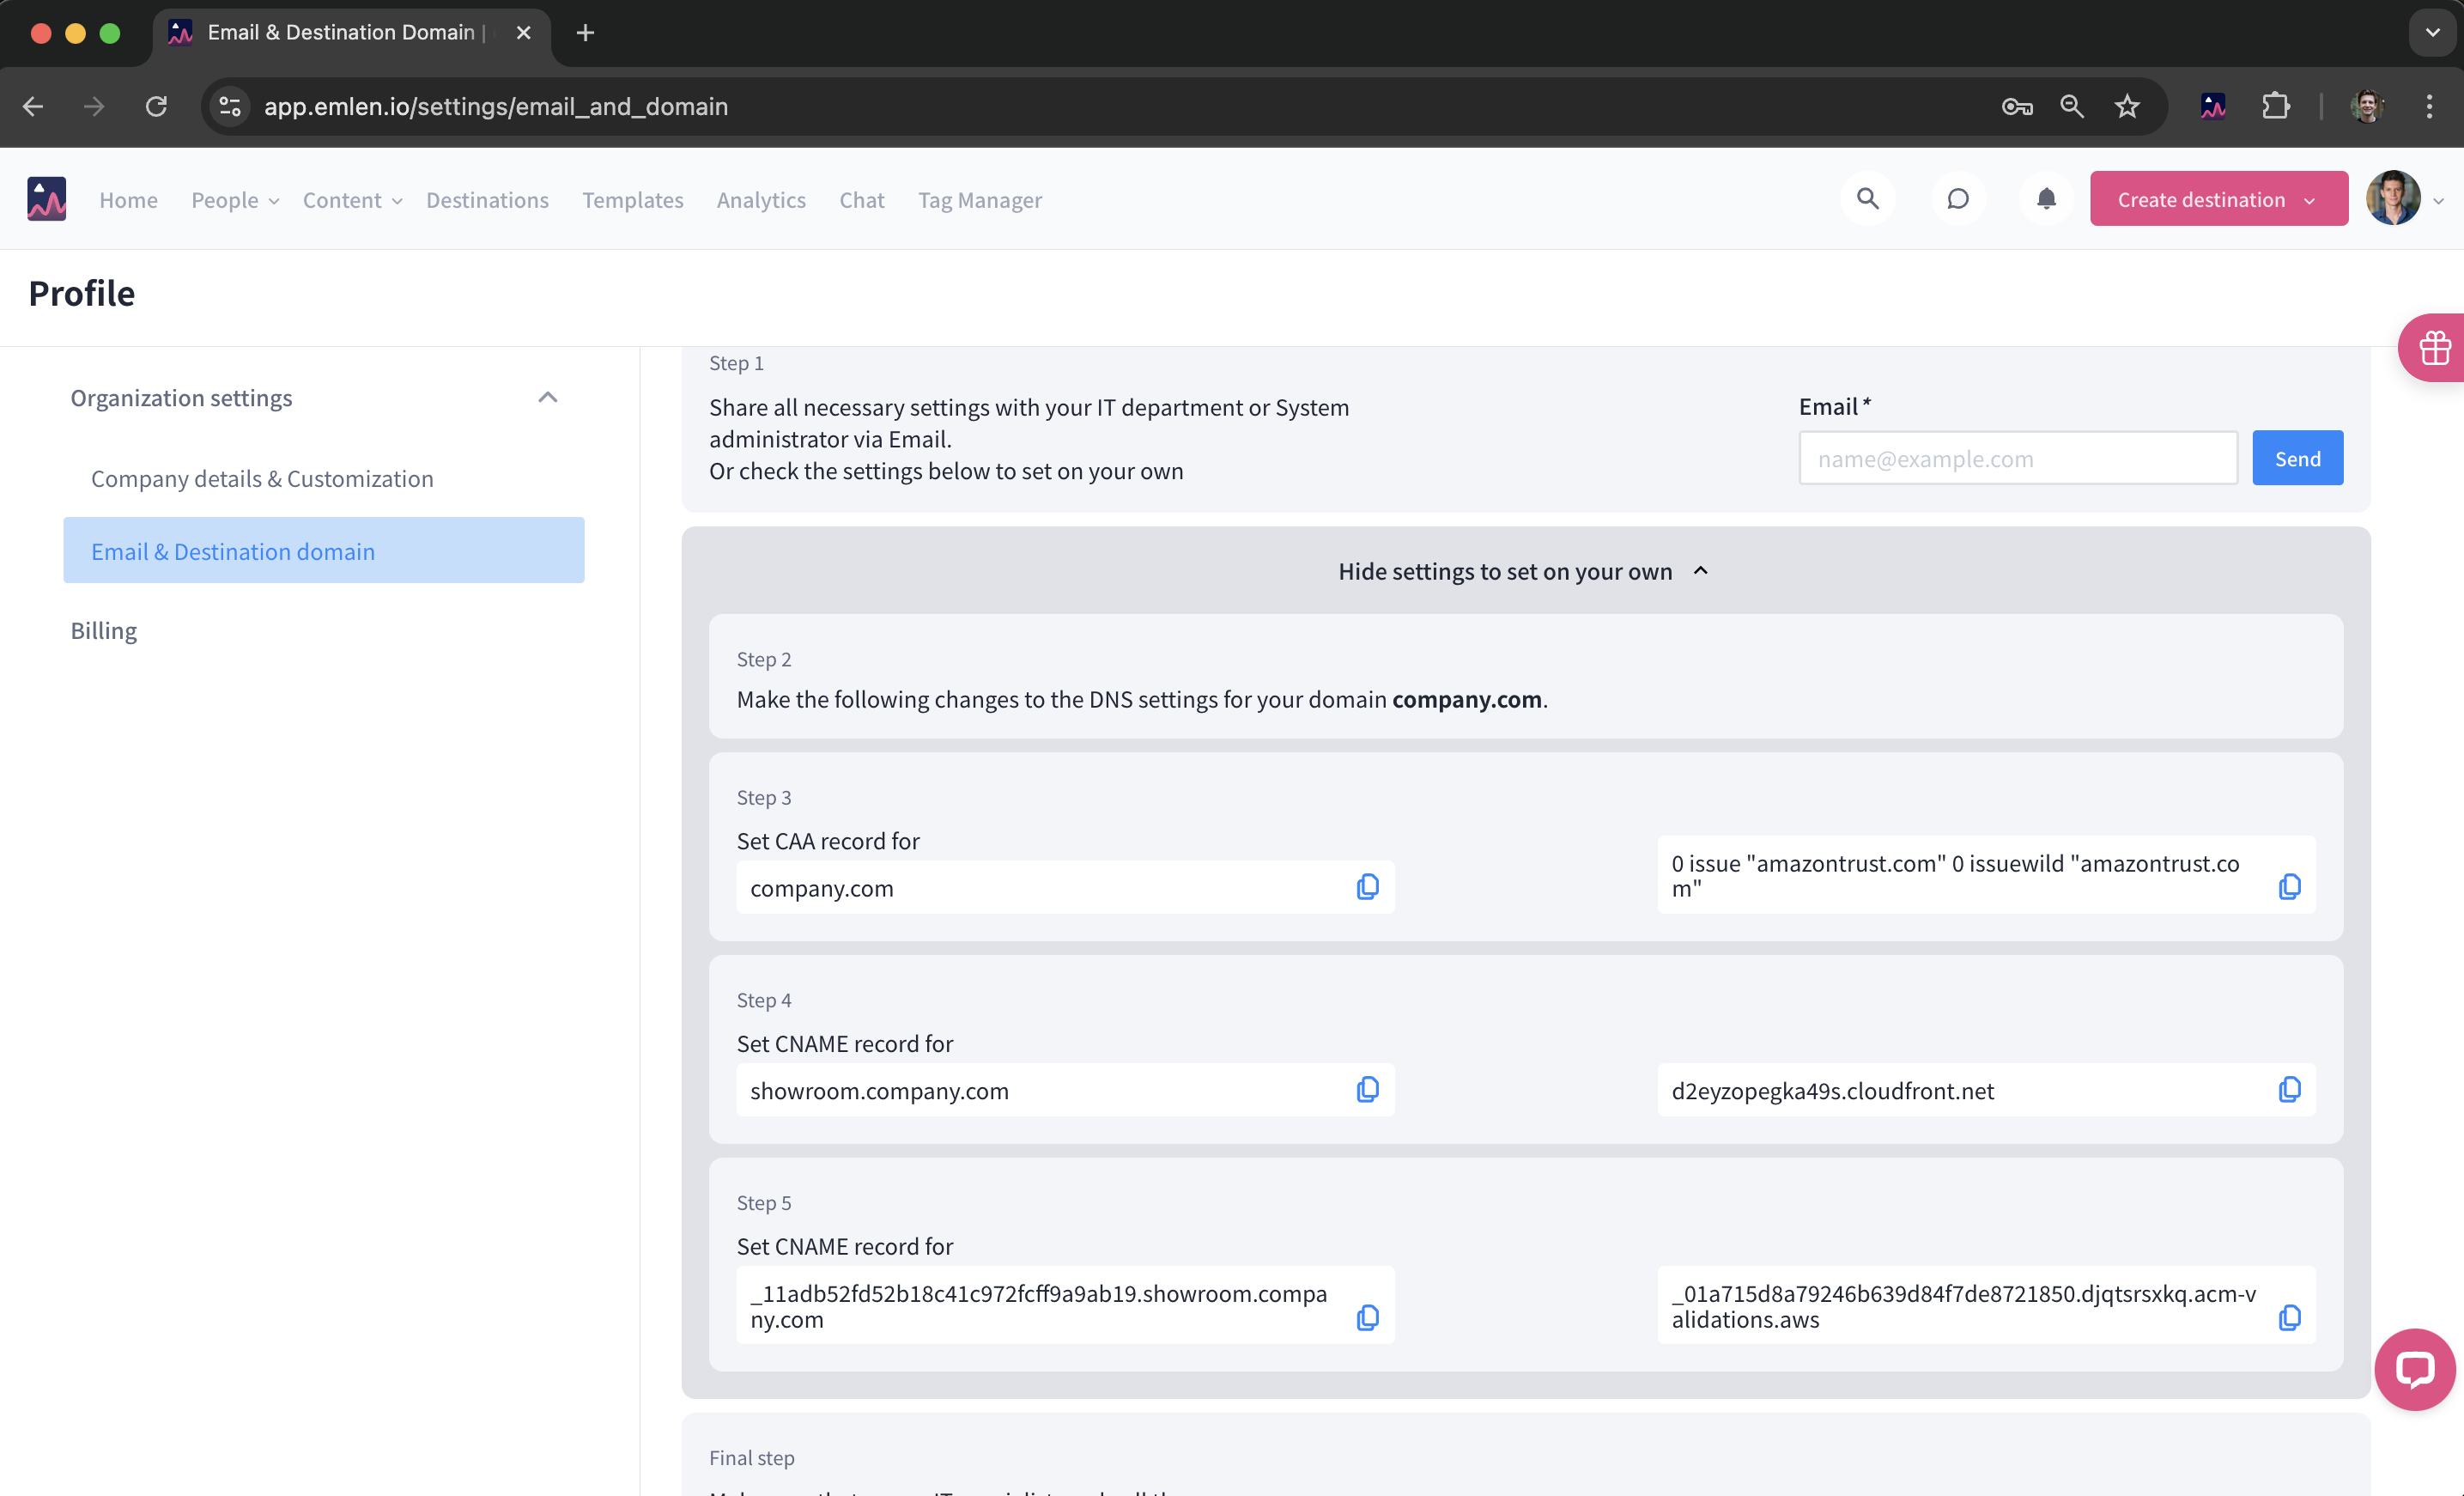
5. Verifiy the connection
Once the DNS entries are set up, go back to the settings page.
Once the DNS entries are set up, go back to the settings page.
- Check the box for “All DNS changes are done and ready to connect.”
- Then click Verify.
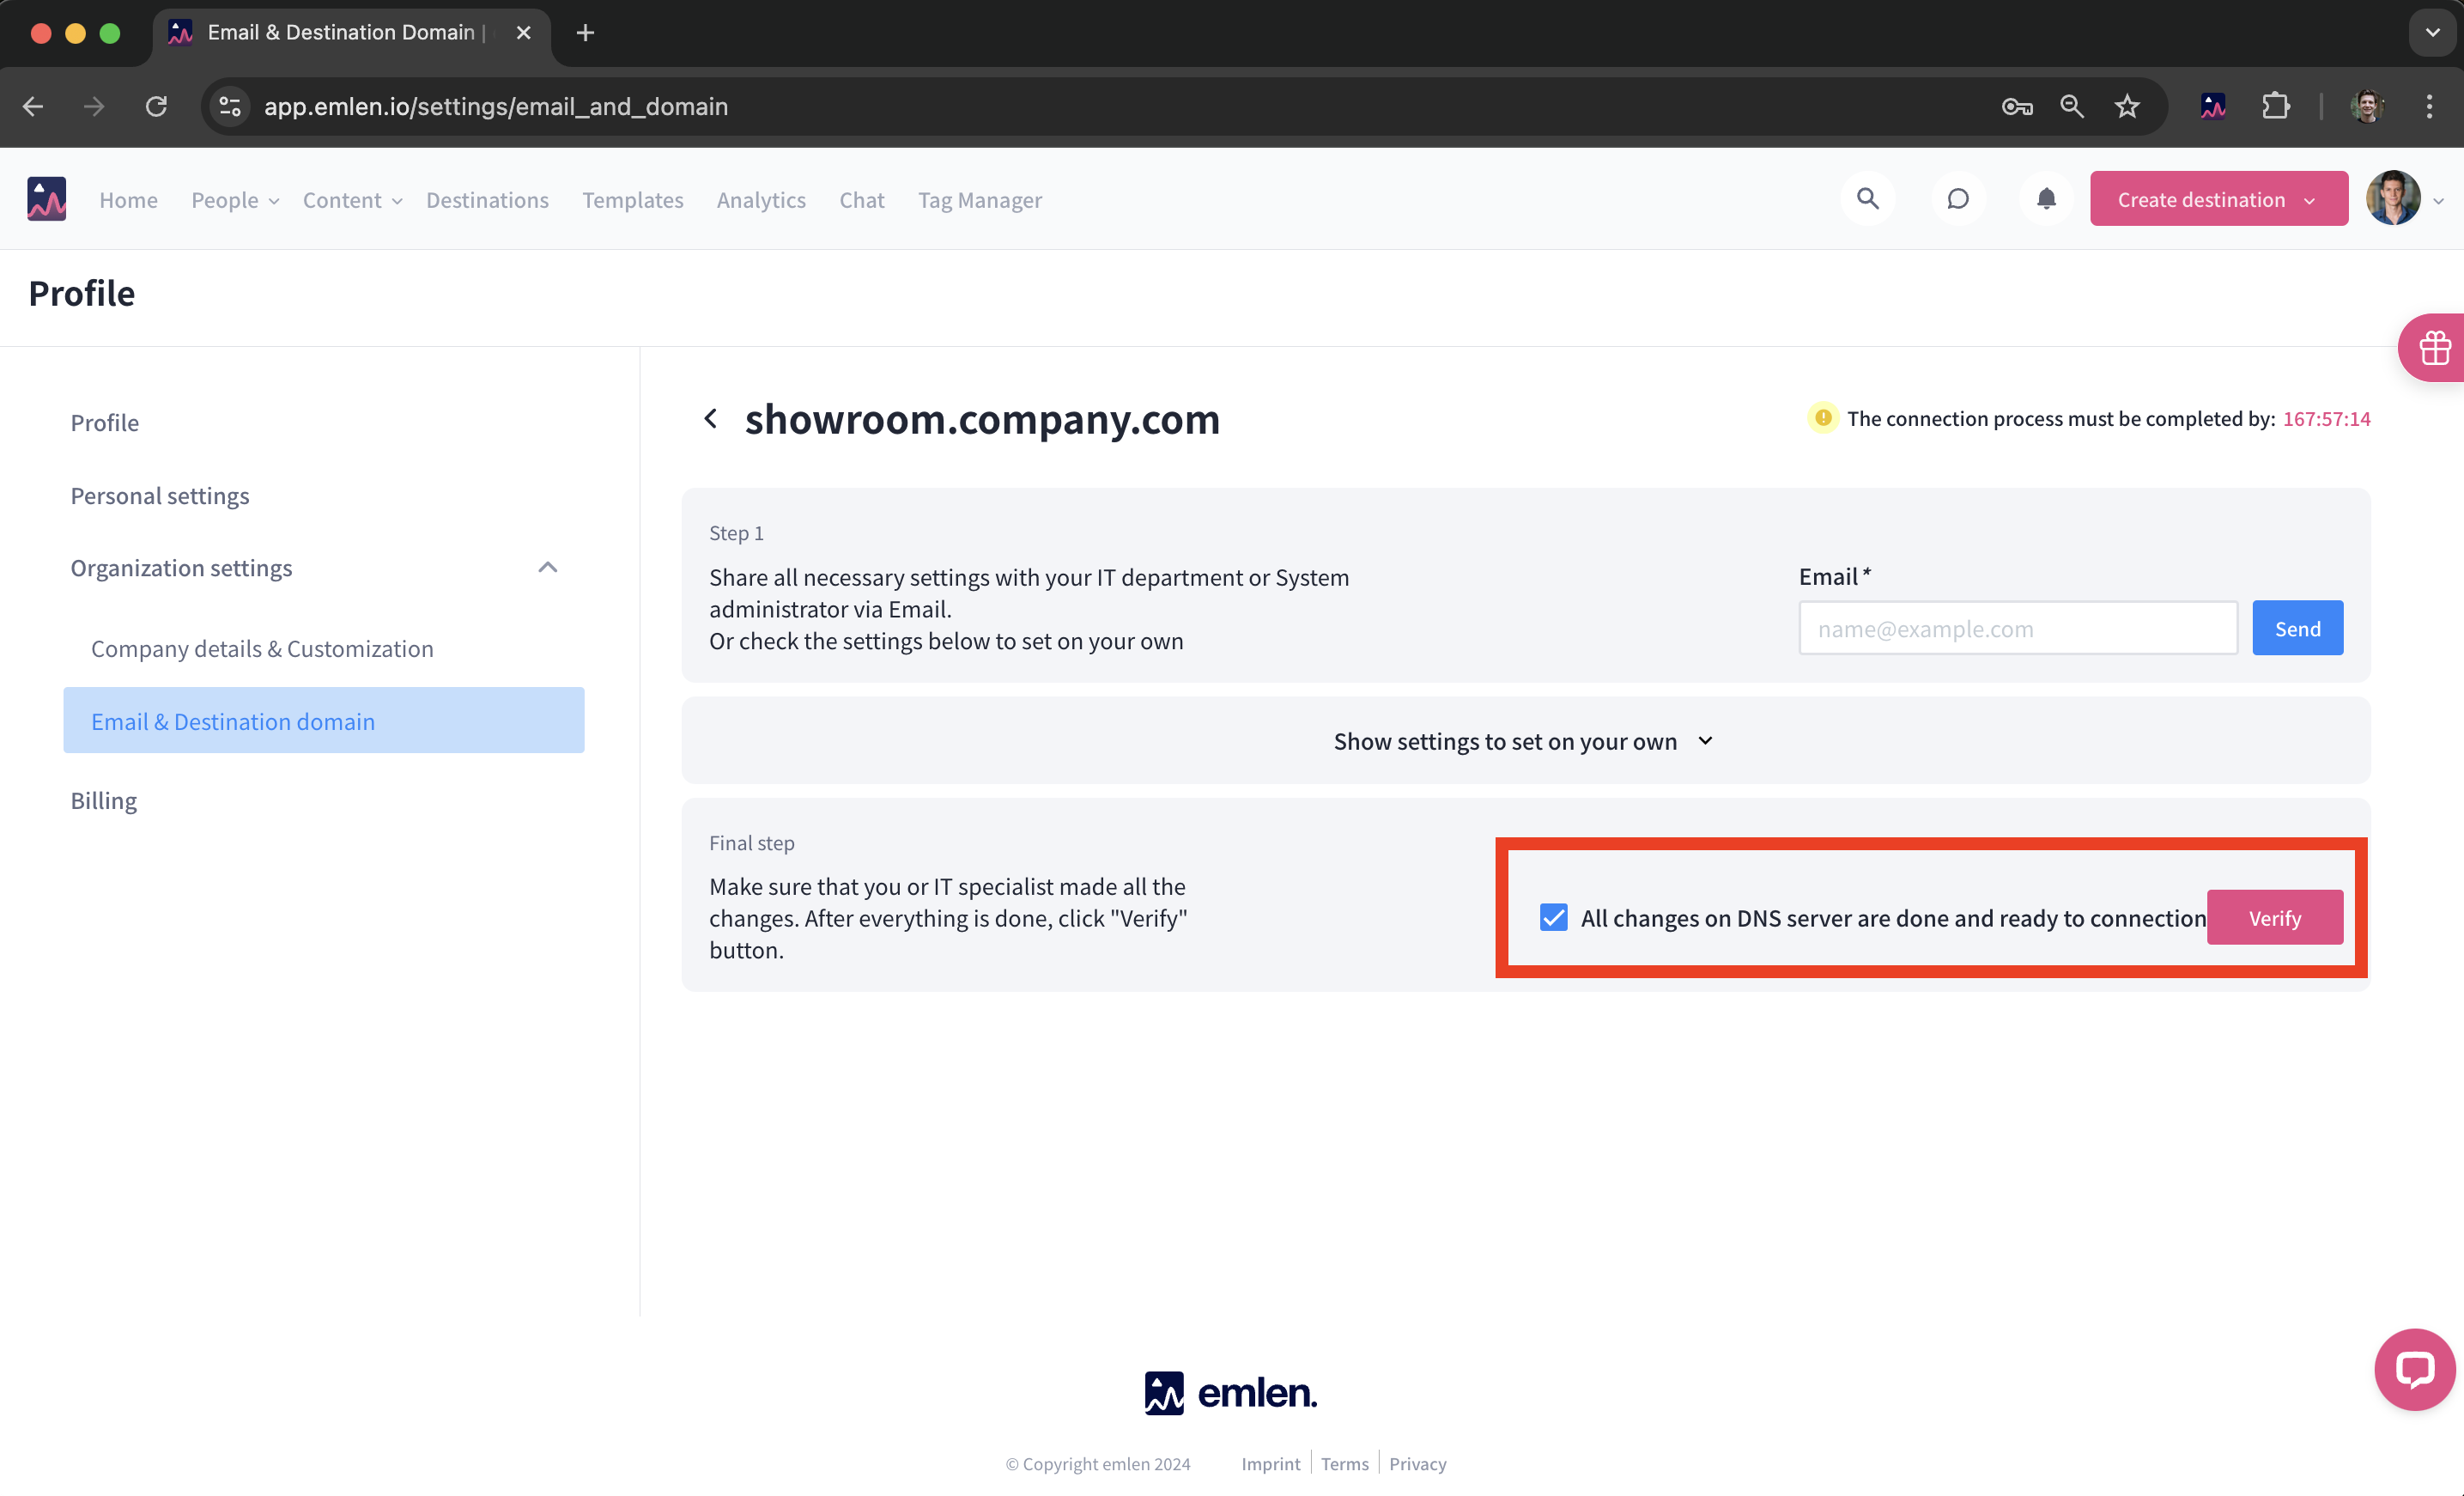
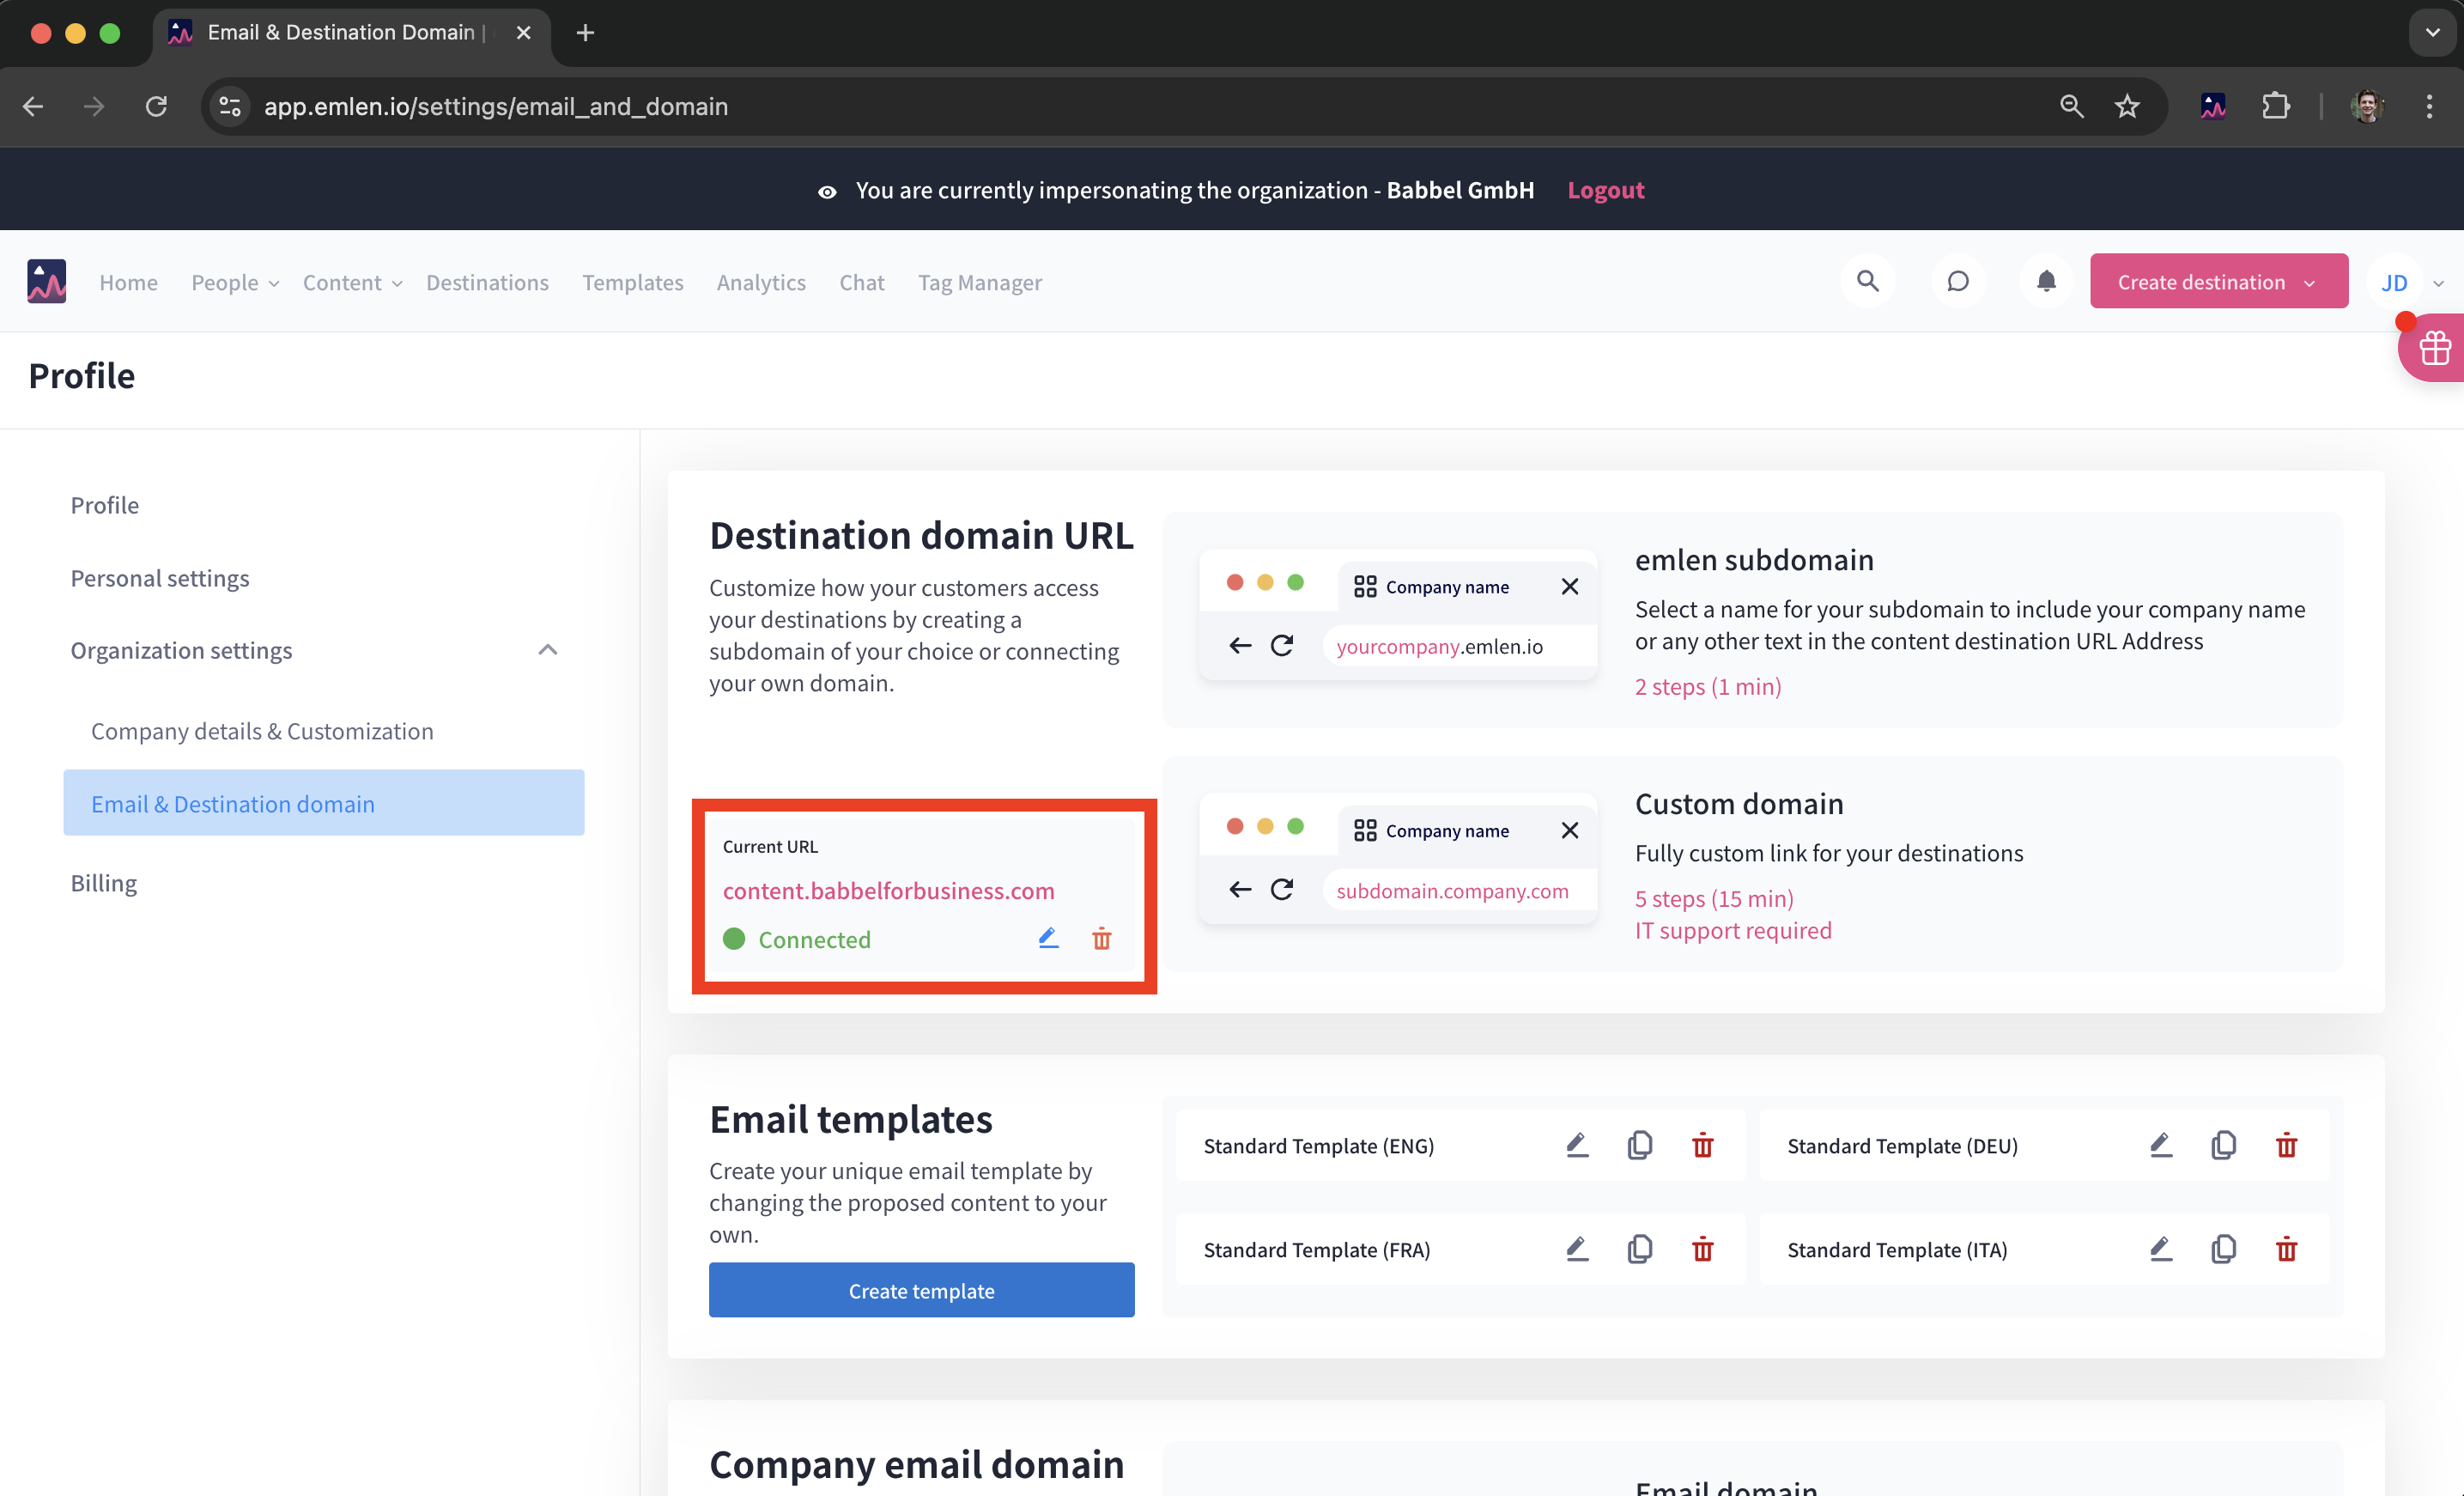
The verification process can take up to one day. Only once this is complete can Destinations be created with the custom address. The URL should then display in green with the status Connected.
6. Check if you can access your Destinations.
Create a test Destination and visit it. If you encounter a network error, the subdomain may be blocked on your company network. Try accessing it from a personal device to verify. If it works there, contact your IT department to whitelist the subdomain for your company network.
⚠️ Important: Please ensure these DNS records are not deleted or modified. Additionally, instruct your IT admin to follow this guidance. These records are essential for keeping the domain online and ensuring the renewal of security certificates (every 13 months).
Troubleshooting
If you need to reconnect the same domain due to an error or other issue:
- Delete any existing emlen DNS records you previously created
- Wait approximately 24 hours (or the duration of your specific Time-to-Live, TTL) for the entries to fully clear
- Remove the connection in emlen and restart the setup process
If no DNS records are created within 24 hours: The entries will be automatically deleted, allowing you to restart the process.