
Tag Manager
Note: the tag manager is available in the Business package.
If you manage a large number of content assets (>20–30), it’s highly recommended to segment and tag them. This makes organizing and finding content much easier. You can also use the Tag Manager to create Buyer roles that you assign to contacts on your destinations. Then you know which contact on buyer side has which role.
Common tag sets include:
- Buyer role
- Lifecycle / buyer stage
- Deal stage
- Product / product line
- Industry
- Use case
- Persona
- Asset type
- Language
We recommend limiting tag sets to 3–5, making it easier for the sales team to quickly find the right content.
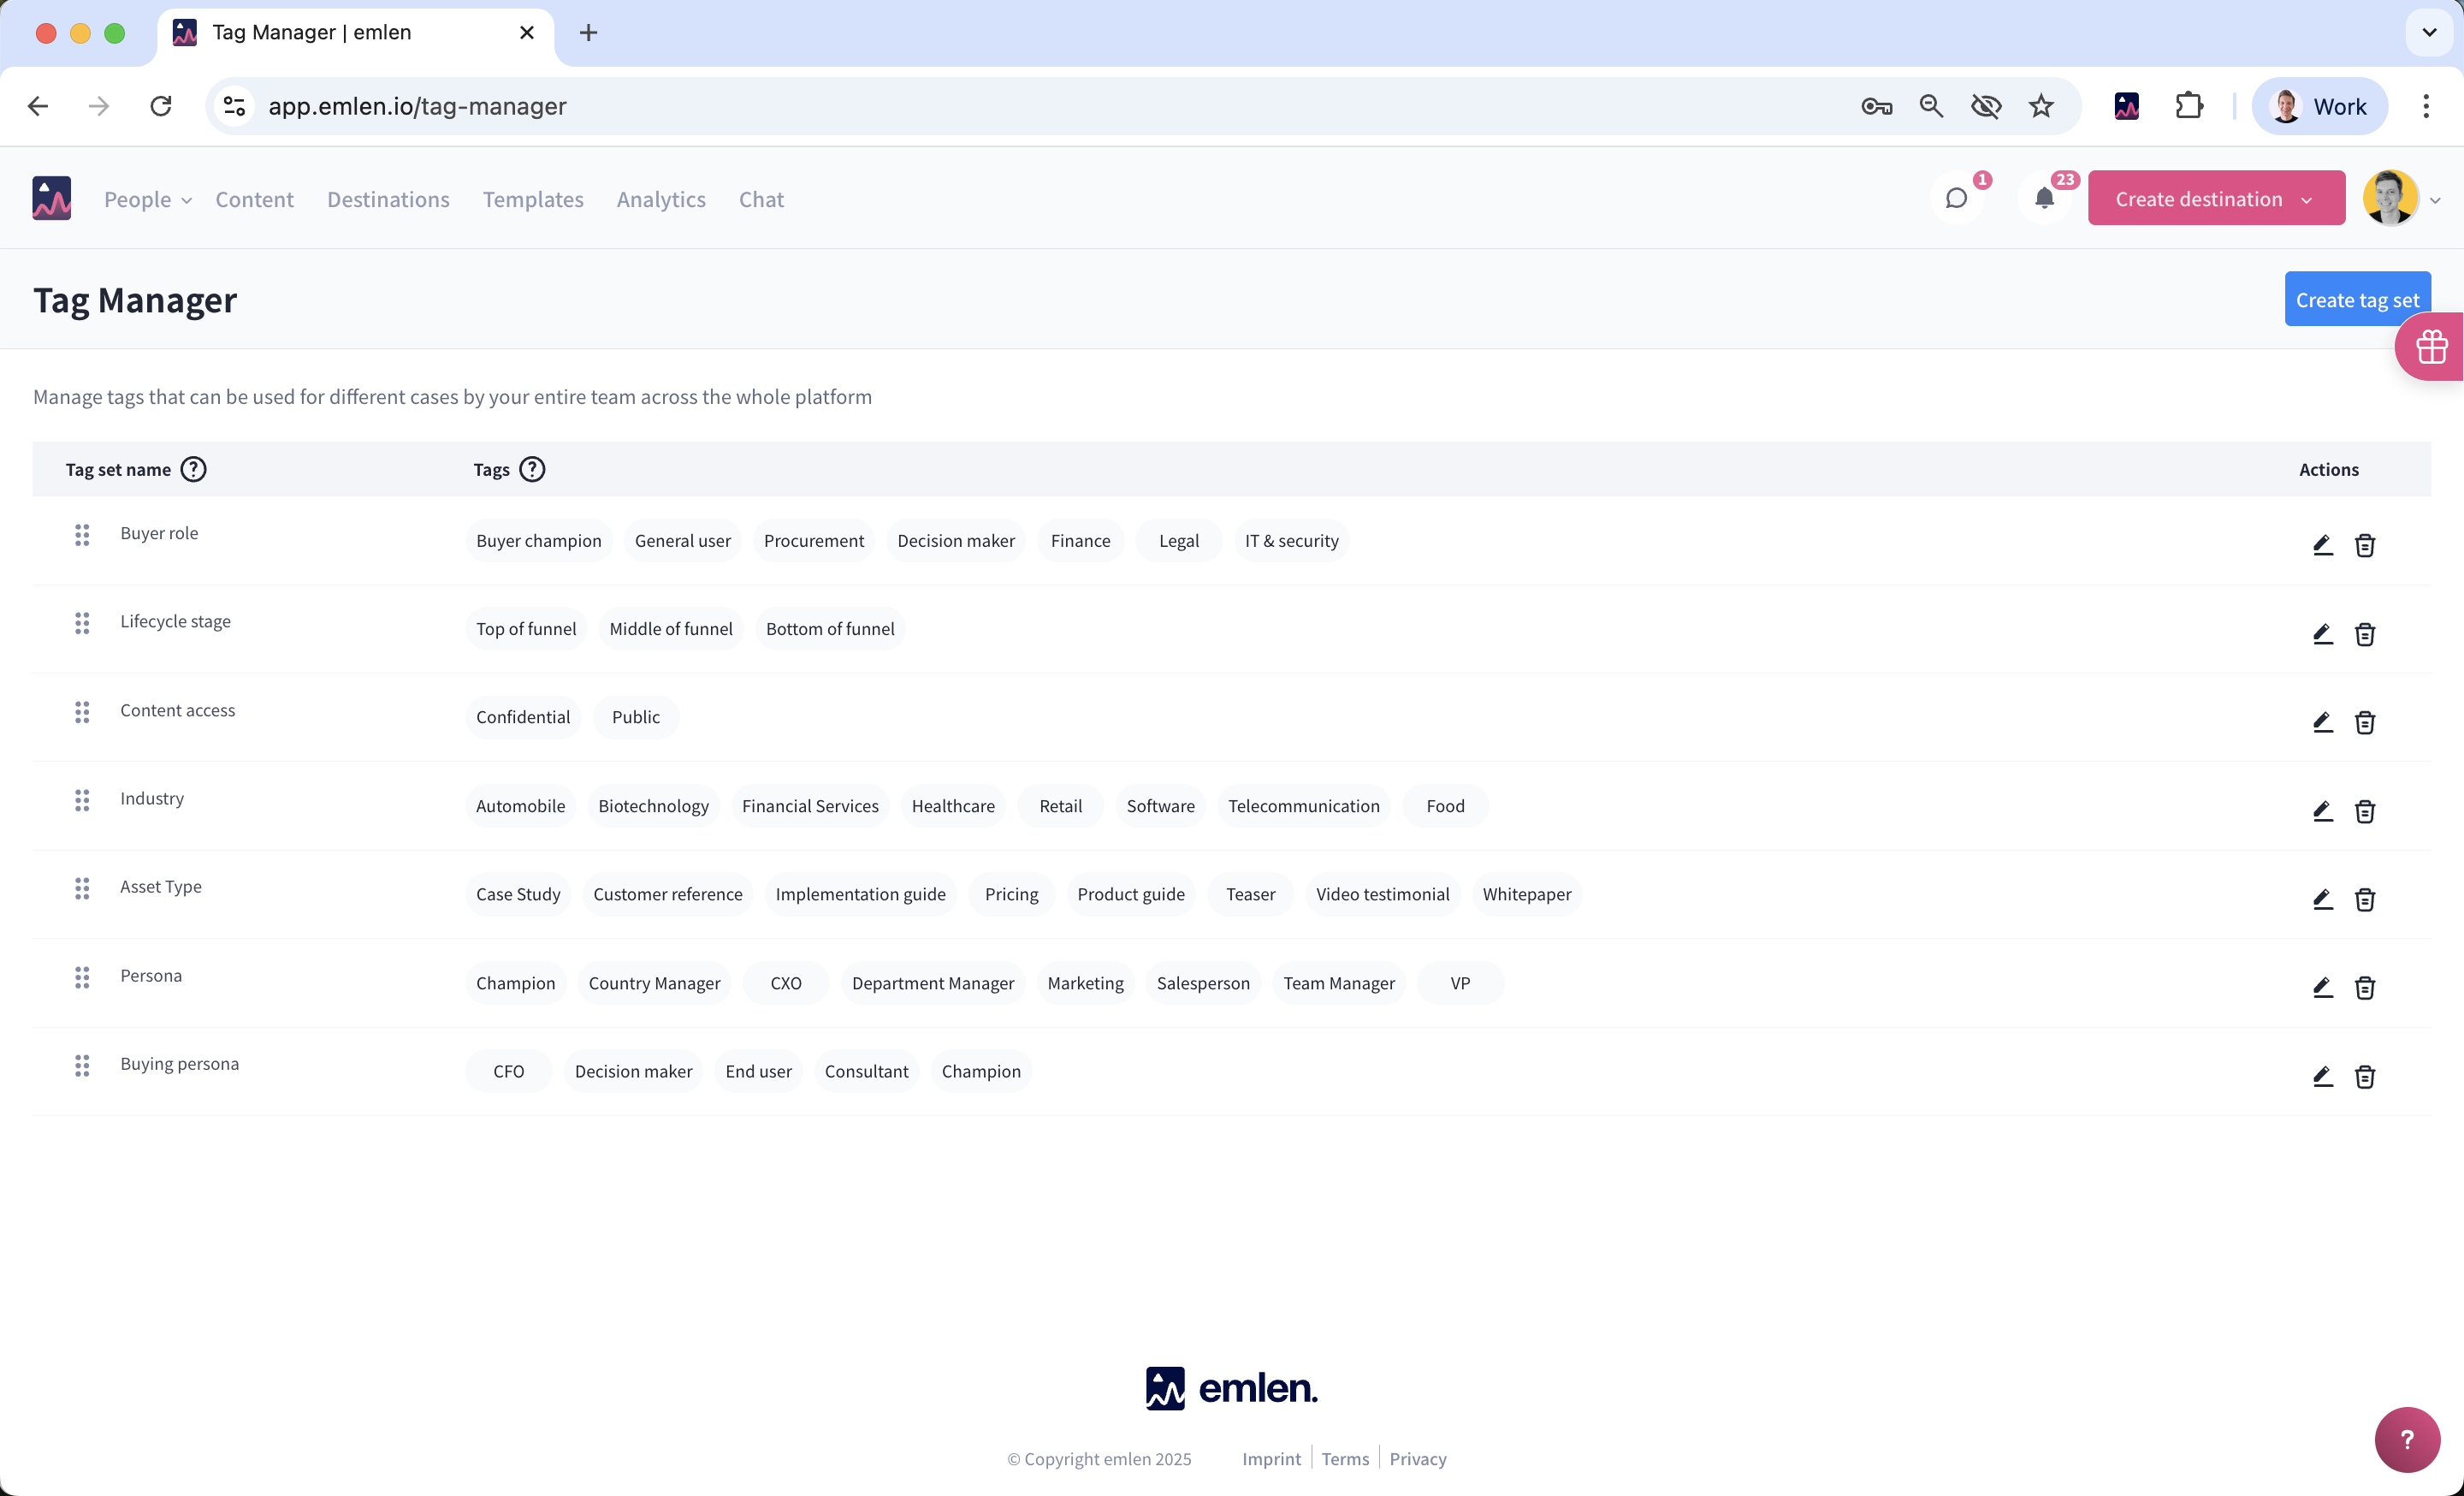
Creating Tag Sets and Tags for content
- Go to Tag Manager and click “Create tag set”
- Define the tag set name (e.g., Buyer stage)
- Define the tags (e.g., Awareness, Consideration, Decision)
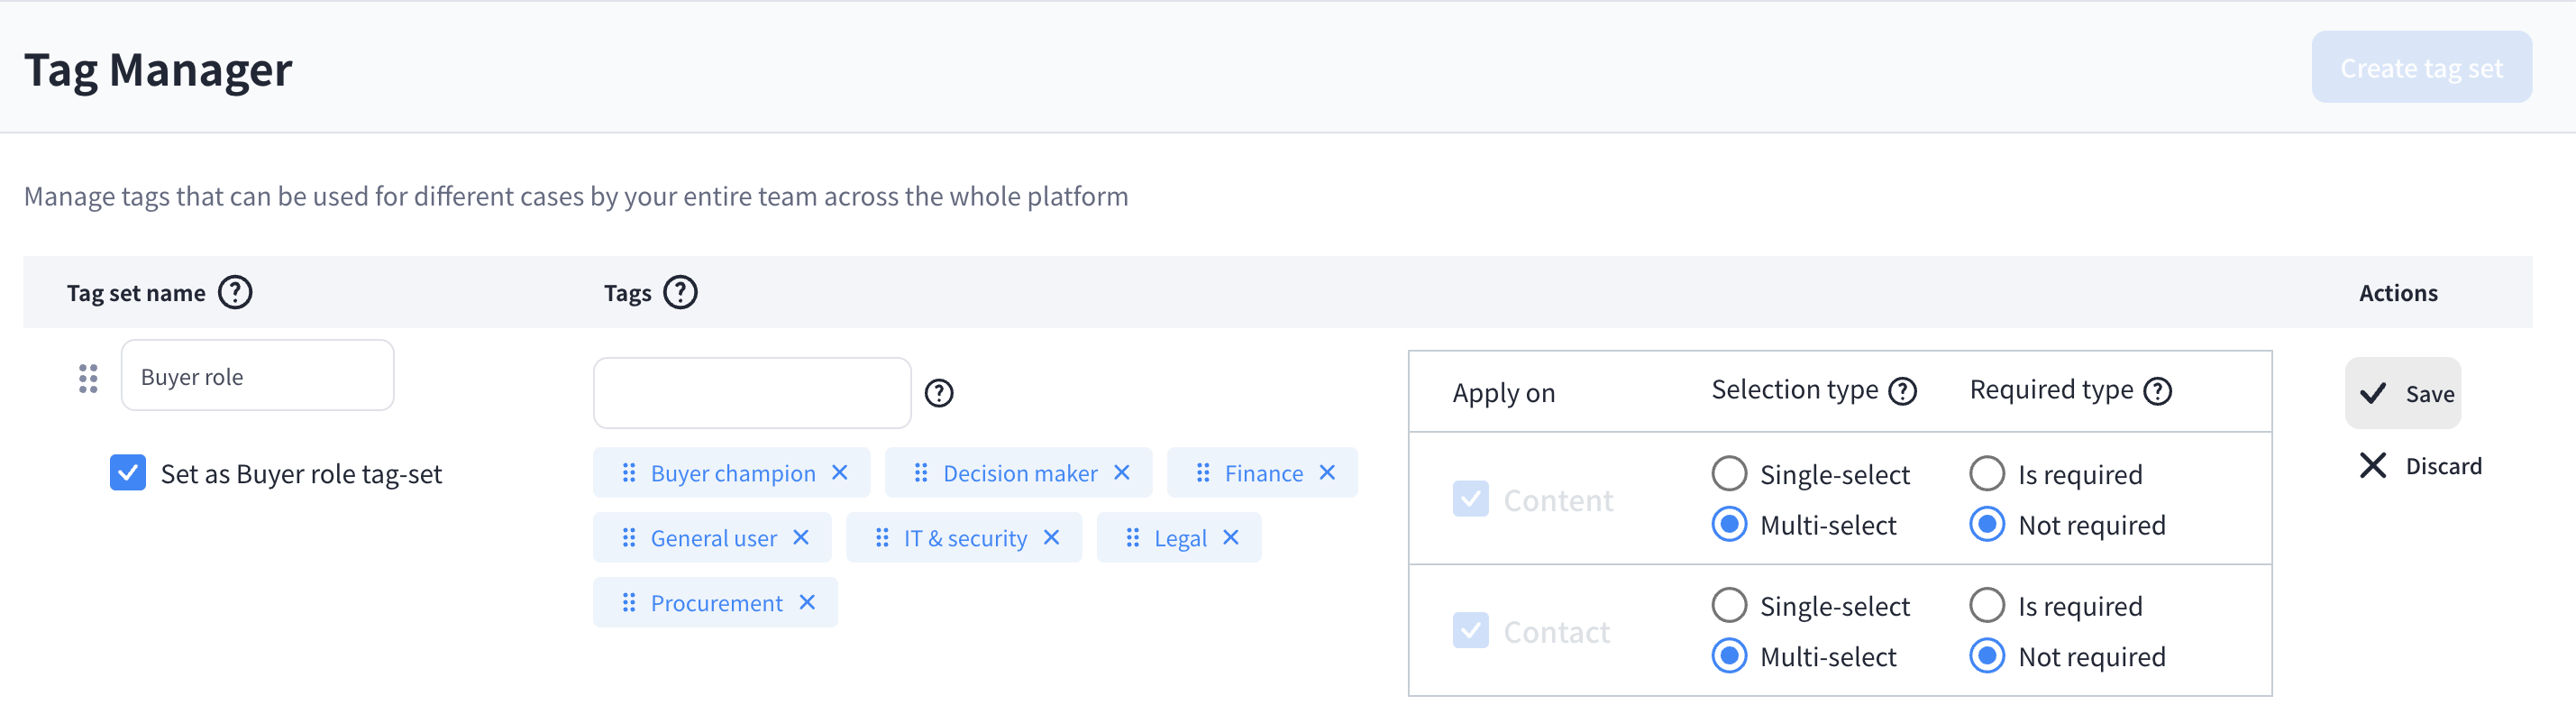
- Set Apply on: Content
- Choose between Single-select or Multi-select:
- Single-select: A content asset can only have one tag from the set (e.g., Language: German or English, but not both)
- Multi-select: A content asset can have multiple tags (e.g., Use cases or Industries)
- Decide if the tag set is required:
- If required, every new content asset must be tagged with this set after upload
- Example: To ensure all assets have a Language tag, mark this set as required
Once your tag sets and tags are defined, you can start uploading content and apply the tags directly.
Creating Tag Sets and Tags for Buyer roles
Create your Tag set as described above but check the box "Set as Buyer role tag set".
Then you can assign those roles in two different ways inside your destination.
In the edit mode when creating or editing a destination, you see the option "Edit roles" right next to where you add the email address of your contacts.

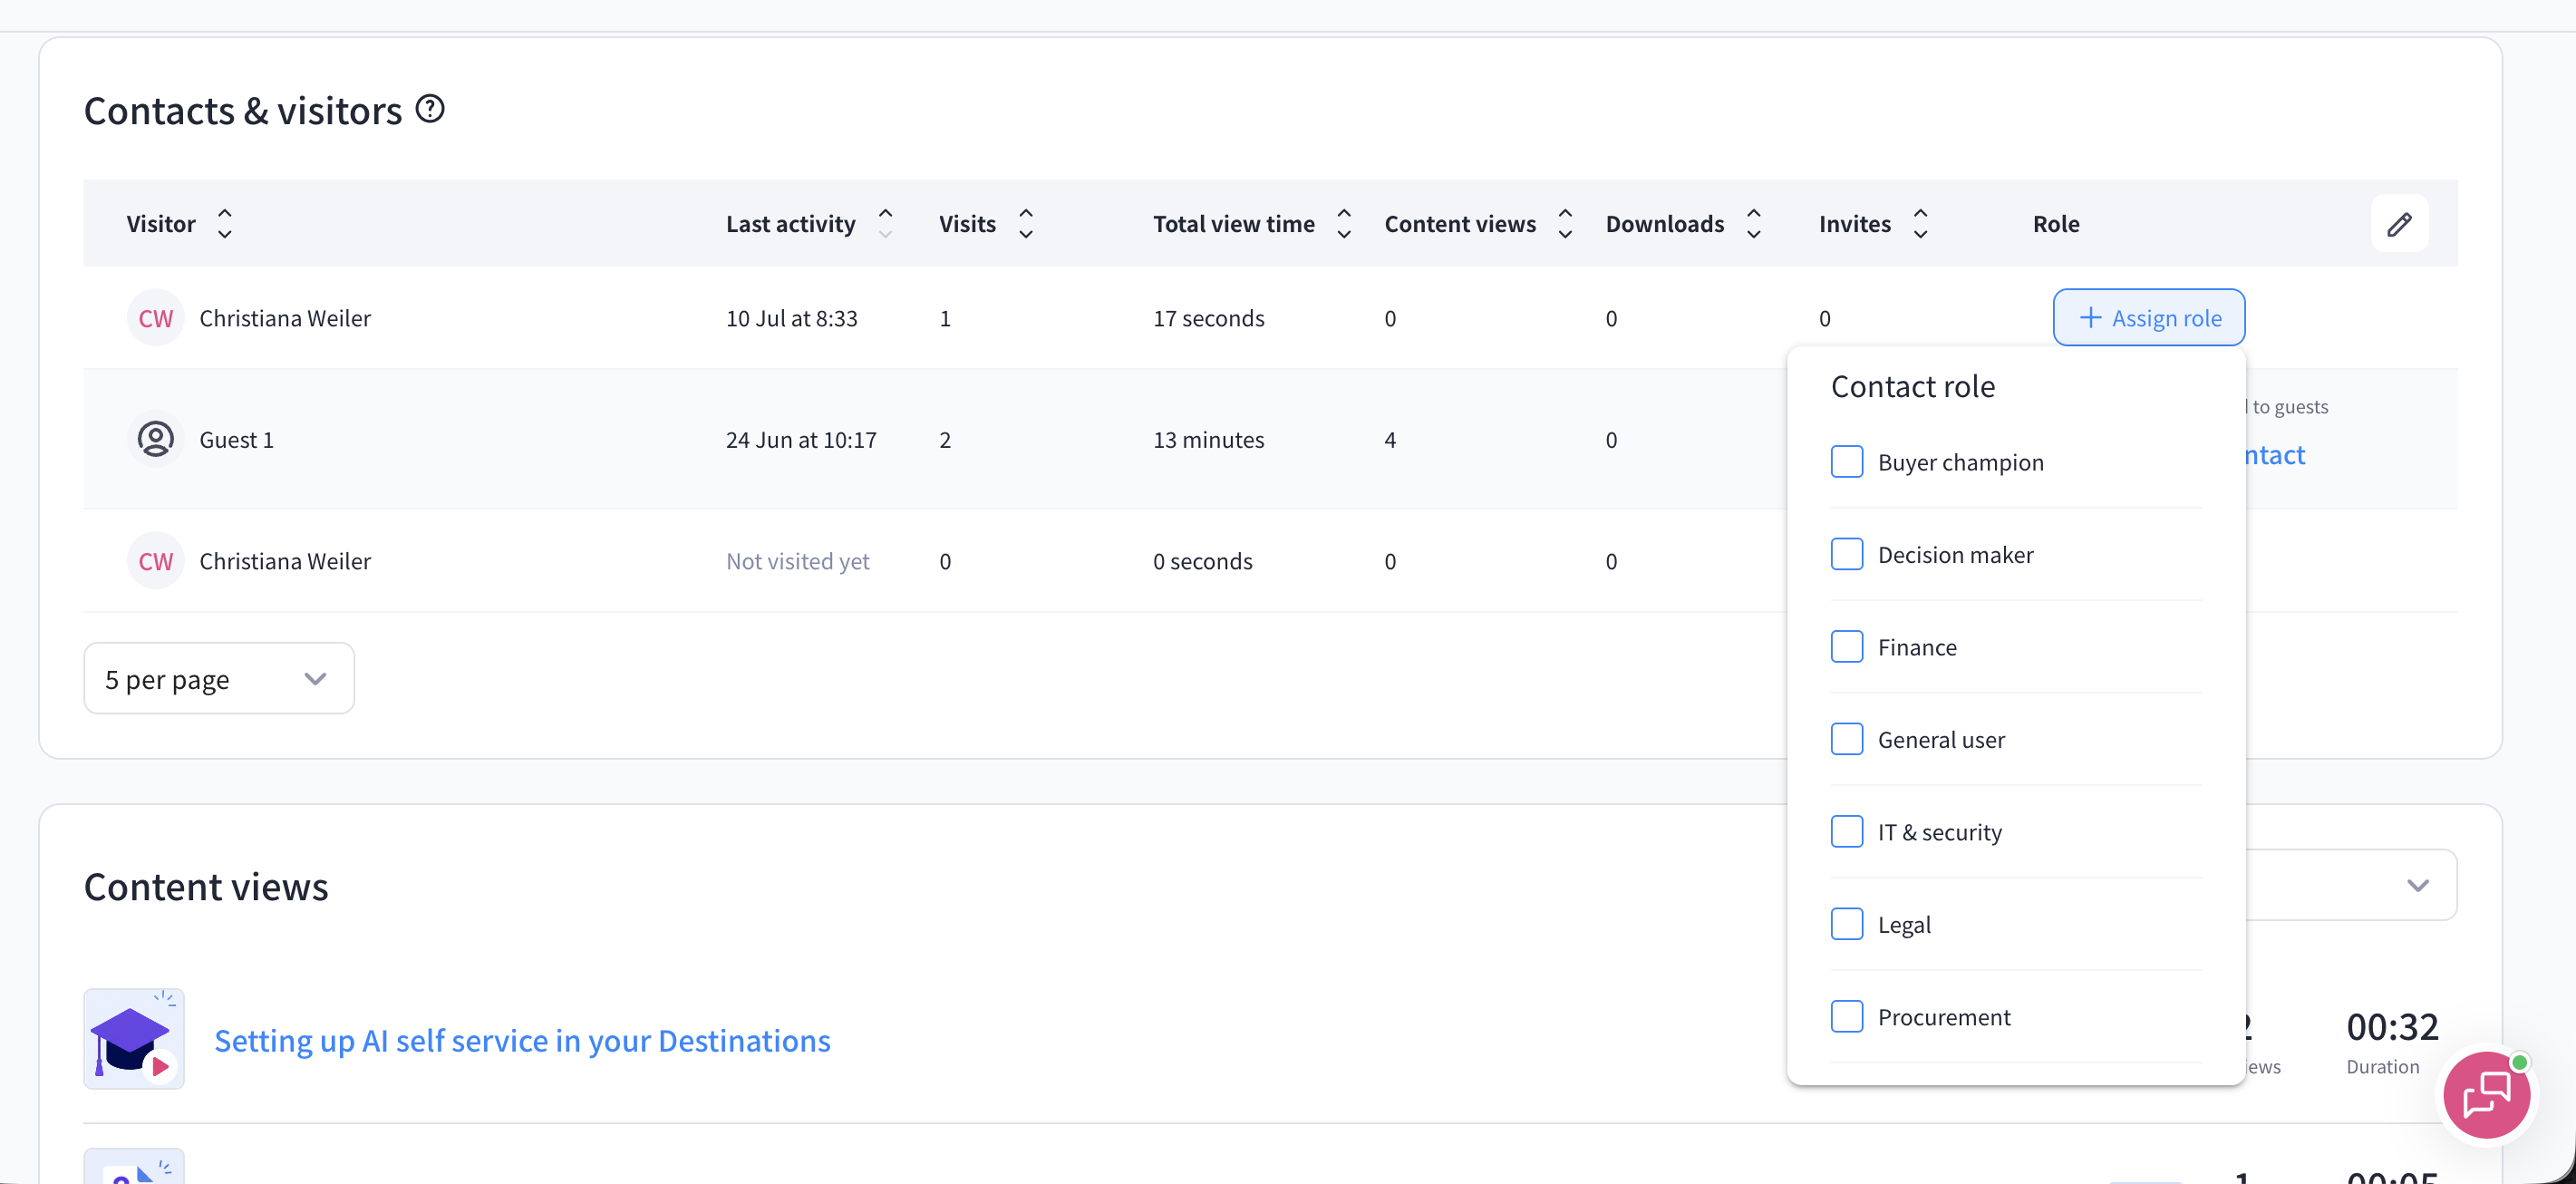
When clicking on the destination name in the overview and scroll down to see the attached contacts, you see an option to assign a role to each contact.
Updating Tags on Existing Content
You have two options:
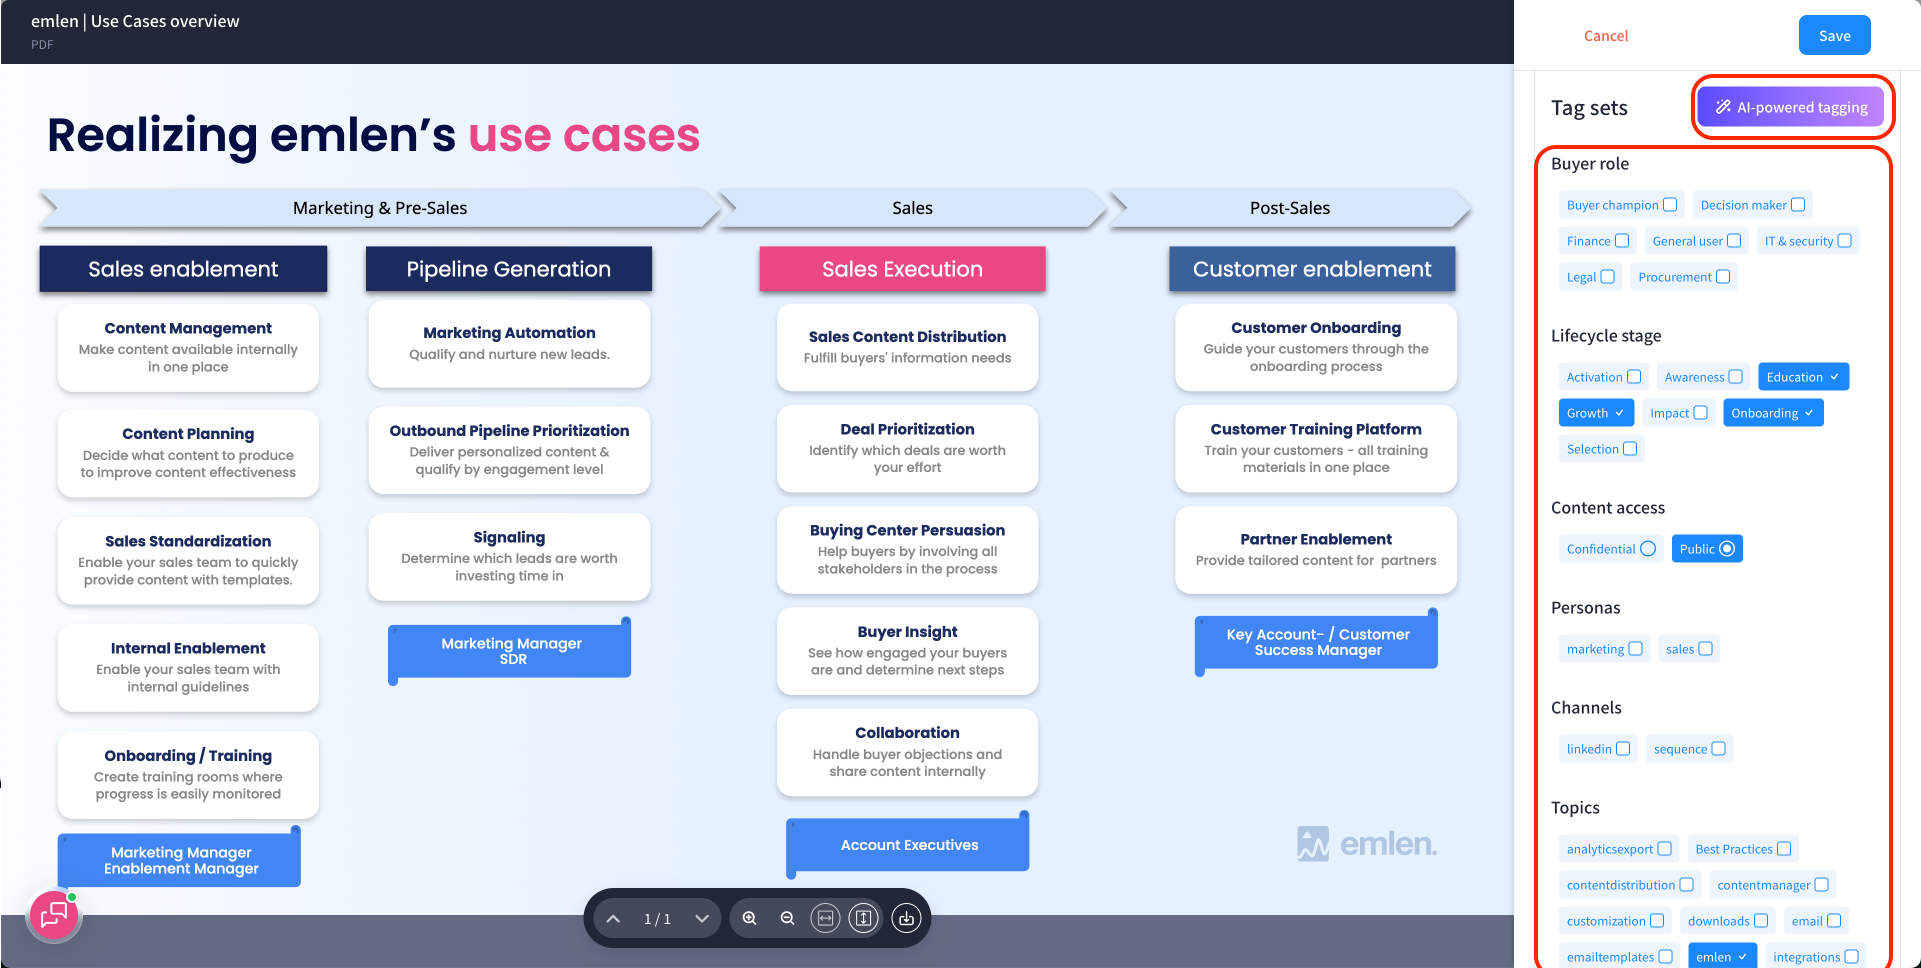
1. Edit individually: Click “Edit” on a content asset and update its tags manually OR with the AI-powered tagging.
2. Bulk-edit via CSV (Admin rights required)
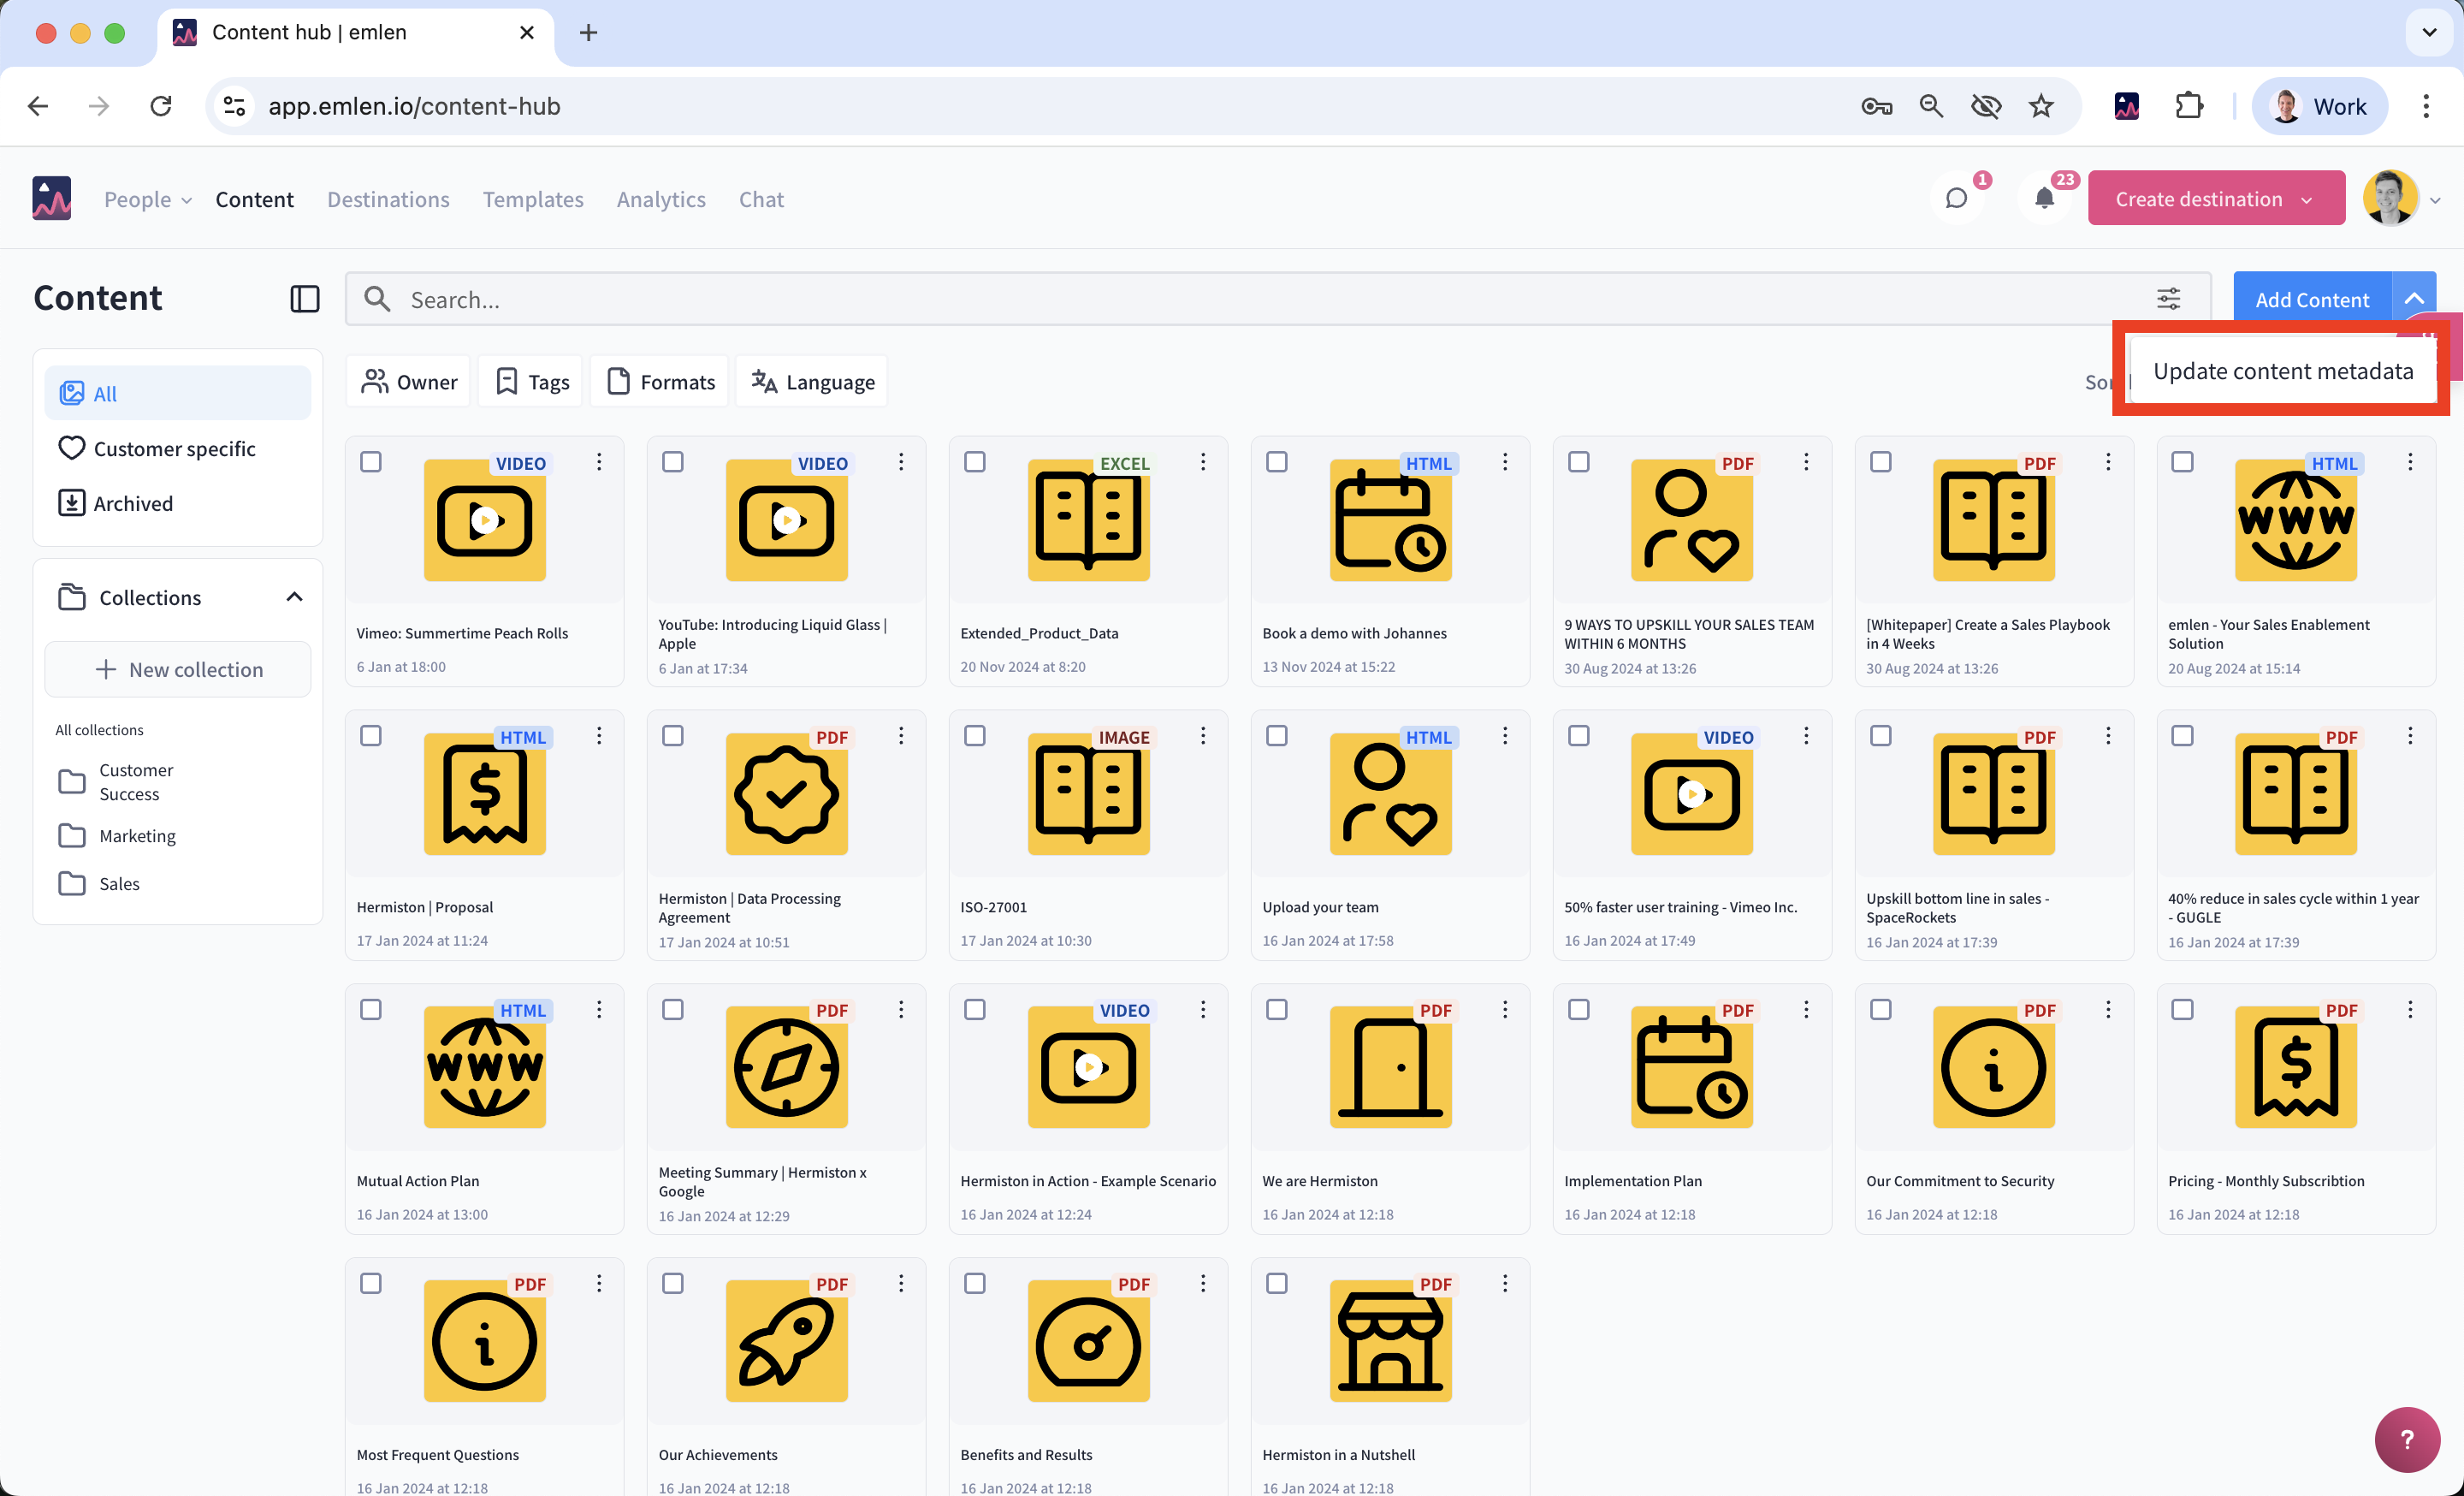
- Click “Update content metadata” and follow the steps:
- Download the CSV file
- Open in Excel
- Go to Data → Get Data (Power Query) → Text/CSV
- Select the CSV file downloaded from emlen
- Choose Comma as the separator/delimiter
- Click Load
- Filter for “Content Hub” in the visibility_scope column
- Edit, add, or remove tags in the columns on the right. Important: You can only use tags that already exist in the Tag Manager (new tag sets or tags cannot be created via Excel)
- Save the file as CSV
- Re-upload it to emlen (Step 2: Upload updated data)